GROWING AND PREPARING COLLARD GREENS
The large green leaves of the collard green stand out in the garden. Earthy and slightly bitter in taste they are a personal favorite!
![]()

Collard greens are the new “It Girl” in the gardening and greens ‘scenes’. They have a prominent spot in my cool Spring garden, which includes 18 separate plantings including greens, brassicas, snap peas, herbs, and more. You can see the layout, seed choices, and each planting here on the Garden to Table section.
If you don’t know, collard greens are leafy green vegetables that belong to the same family as cabbage, broccoli, and kale. They are native to the Mediterranean region but are now commonly consumed in various cuisines worldwide, particularly in Southern United States, Africa, and Brazil.
Collard greens have large, dark green leaves that are thick and slightly bitter in taste. They are known for their robust texture, which makes them versatile in cooking. Collard greens are highly nutritious and are a good source of vitamins A, C, and K, as well as folate, calcium, and fiber.
In culinary preparations, collard greens are often cooked, which helps soften their leaves and reduce their bitterness. They can be boiled, steamed, sautéed, or stir-fried. Common dishes featuring collard greens include soups, stews, side dishes, and salads. In Southern cuisine, they are often slow-cooked with ham hocks, bacon, or other seasonings for added flavor.
Collard greens are not only tasty but also offer several health benefits. They are low in calories and high in nutrients, making them a nutritious addition to a balanced diet


Reasons You’ll LOVE Collard Greens
You’ll become a convert in not time!
-
- Nutrient-rich – Collard greens are packed with vitamins A, C, and K, as well as folate, calcium, and fiber, offering a range of health benefits.
- Versatile – Collard greens can be prepared in various ways, including boiling, steaming, sautéing, or stir-frying, allowing you to explore different cooking methods and flavors.
- Delicious taste – While collard greens have a slightly bitter taste when raw, cooking them helps to soften the leaves and reduce the bitterness, resulting in a savory and flavorful vegetable.
- Texture – Collard greens have a robust texture that holds up well when cooked, providing a satisfying bite and mouthfeel in your dishes.
- Culinary diversity – Collard greens are used in cuisines around the world, offering an opportunity to explore and experiment with different cultural recipes and flavors.
- Southern comfort food – In Southern American cuisine, collard greens are a staple and are often slow-cooked with flavorful additions like bacon or ham hock, providing a comforting and soulful dish.
- Low in calories – Collard greens are a great choice for those looking to maintain a healthy diet as they are low in calories but still highly nutritious, making them a good option for weight management.
- Supportive of a balanced diet – Including collard greens in your meals helps diversify your vegetable intake, providing a range of essential nutrients to support overall health and well-being.

Collard Greens Quick Growing Tips
Collard greens (Brassica oleracea var. acephala) are cool-season leafy vegetables that are commonly grown for their nutritious and flavorful greens. Here’s a general overview of how collard green seedlings grow:
-
- Germination – Collard green seeds require proper soil temperature and moisture for germination. Start by sowing the seeds in a seed tray or individual containers filled with a well-draining potting mix. Plant the seeds about ¼ to ½ inch deep and cover them with a thin layer of soil. Keep the soil consistently moist but not waterlogged.
- Ideal conditions – Collard greens thrive in cooler temperatures, ideally between 60°F to 75°F (15°C to 24°C). They can tolerate a light frost but may suffer in extremely hot temperatures. Place the seed tray or containers in a location that receives full or partial sunlight.
- Seedling growth – After about 7 to 10 days, the collard green seeds should start to germinate. Tiny seedlings will emerge from the soil with their first set of true leaves. As they grow, provide sufficient light, preferably 12 to 16 hours of daily sunlight, or use supplemental grow lights.
- Transplanting – When the seedlings have developed a few sets of true leaves and are around 3 to 4 inches tall, they are ready to be transplanted into the garden or larger containers. Choose a sunny spot in your garden with fertile, well-draining soil. Space the seedlings about 18 to 24 inches apart to allow them room to grow.
- Care and maintenance – Water the transplanted seedlings thoroughly after planting and continue to water regularly to keep the soil evenly moist. Collard greens prefer consistent moisture but avoid overwatering, as it can lead to root rot. Mulching around the plants can help retain moisture and suppress weeds.
- Fertilization – Collard greens benefit from regular fertilization. Use a balanced fertilizer or organic compost to provide essential nutrients. Follow the package instructions for application rates and frequency.
- Harvesting – Collard greens are typically ready for harvest in about 55 to 85 days from planting, depending on the variety. Harvest the outer leaves when they reach the desired size, leaving the inner leaves to continue growing. You can cut the outer leaves at the base or harvest the entire plant. Regular harvesting promotes new growth and a longer harvest period.
By following these steps, you should be able to grow healthy collard green seedlings and enjoy a bountiful harvest of nutritious greens. Remember to adjust the growing conditions based on your specific climate and local recommendations.

How to Grow Collard Greens
Collard greens are quite easy to grow!
-
- Choose a suitable location – Collard greens thrive in full sun, but they can also tolerate partial shade. Select a spot in your garden that receives at least 6 hours of direct sunlight each day.
- Prepare the soil – Collard greens prefer well-draining soil rich in organic matter. Amend the soil by adding compost or well-rotted manure to improve its fertility and drainage. Remove any weeds or debris from the area.
- Planting – Collard greens can be grown from seeds or seedlings. If starting from seeds, sow them directly into the garden soil, planting them about 1/4 to 1/2 inch deep and 18 to 24 inches apart. Alternatively, you can start seeds indoors 4-6 weeks before the last frost and transplant the seedlings once they are around 4-6 inches tall. If using seedlings, transplant them into the garden at the same spacing.
- Watering – Keep the soil consistently moist during the growing season. Water deeply and regularly, ensuring the plants receive about 1 inch of water per week. Avoid overwatering, as this can lead to diseases.
- Fertilizing – Collard greens benefit from regular feeding. Apply a balanced fertilizer or organic compost around the base of the plants every 4-6 weeks to provide the necessary nutrients.
- Mulching – Apply a layer of organic mulch, such as straw or wood chips, around the plants to help retain moisture, suppress weeds, and maintain an even soil temperature.
- Maintenance – Remove any weeds that compete with the collard greens for nutrients and water. Monitor the plants for pests such as aphids or cabbage loopers and take appropriate measures to control them.
- Harvesting – Collard greens can be harvested when the leaves are large and mature, usually about

Collard Greens Pests and Bugs
While collard greens are generally considered to be relatively pest-resistant, they can still be susceptible to certain pests and bugs in the garden. Here are some common pests that may affect collard greens and some measures to prevent or manage them.
-
- Cabbage Worms – Cabbage worms are the larvae of white butterflies or moths. They can chew through leaves, leaving behind holes and causing damage to the plants. To control cabbage worms, you can handpick them from the plants or use organic insecticides such as Bacillus thuringiensis (BT) to target and kill the larvae.
- Aphids – Aphids are small, soft-bodied insects that can cluster on the undersides of leaves, causing stunted growth and yellowing of the leaves. To control aphids, you can spray the plants with a strong stream of water to dislodge them or use insecticidal soap or neem oil to control the infestation.
- Flea Beetles – Flea beetles are small, jumping insects that feed on the leaves of collard greens, creating small holes and causing the leaves to appear speckled or pitted. To protect collard greens from flea beetles, you can use row covers to physically prevent them from accessing the plants. Additionally, applying diatomaceous earth or organic insecticides can help deter and control flea beetle populations.
- Slugs and Snails – Slugs and snails are common garden pests that can feed on the leaves of collard greens, leaving behind irregular holes and slime trails. To manage these pests, you can manually remove them from the garden or use organic slug and snail baits or traps. Creating barriers like copper tape around the plants can also deter them.
- Cabbage Loopers – Cabbage loopers are green caterpillars that can chew on collard green leaves, causing skeletonized damage. Handpicking and disposing of the caterpillars is an effective method of control. You can also use floating row covers to prevent adult moths from laying eggs on the plants.
- Cutworms – Cutworms are nocturnal caterpillars that cut off young seedlings at the base, causing them to wilt and die. To protect collard greens from cutworms, you can place collars made of cardboard or plastic around the base of the seedlings to create a physical barrier.
It’s important to regularly inspect your collard greens for signs of pests and take appropriate measures for prevention and control. Additionally, promoting overall plant health through proper watering, fertilization, and good garden hygiene can help reduce the chances of pest infestations.

How to Prepare Collard Greens
Preparing collard greens involves a few simple steps to ensure they are clean, tender, and ready for cooking. Here’s a guide on how to prepare collard greens.
-
- Selecting Collard Greens – Choose fresh collard greens with vibrant green leaves that are crisp and free from yellowing or wilting. Look for smaller to medium-sized leaves, as they tend to be more tender and flavorful.
- Washing Collard Greens – Start by washing the collard greens thoroughly to remove any dirt, debris, or potential pests. Fill a large basin or sink with cold water. Submerge the collard greens in the water and swish them around to loosen any dirt or grit. Rinse them under running water to ensure they are clean. Alternatively, you can rinse each leaf individually under running water.
- Removing the Stems – Collard greens have tough stems that need to be removed before cooking. To remove the stems, hold the leaf with one hand and firmly grip the base of the stem with the other. Gently pull the leaf away from the stem, starting at the base and working your way up toward the tip. Discard the stems or save them for composting if desired.
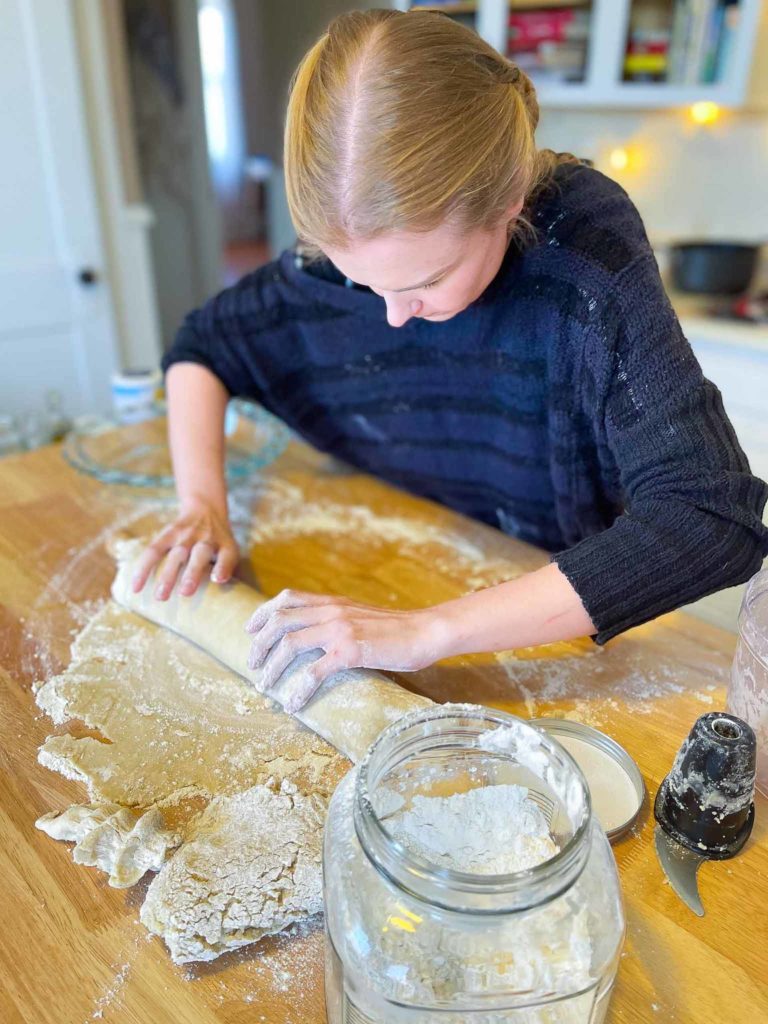
- Preparing the Leaves – Once the stems are removed, stack a few collard green leaves on top of each other. Roll them tightly into a cigar-like shape. Using a sharp knife, slice across the rolled leaves to create thin strips, also known as a chiffonade. Repeat this process with the remaining leaves.

Serving Suggestions for Collard Greens
Simple to prepare and wonderfully delicious!
-
- Sautéed Collard Greens with Garlic and Lemon – Simple and delicious. Sometimes this is all I’ll have for lunch!
- Collard greens and white bean soup – This recipe comes from y grandmother who was an avid gardener who loved all greens!
- Collard Greens Wraps – I LOVE collard green wraps for their taste and health benefits!
- On a salad – I often rough chop my collar greens and add them to a simple garden salad. They pair well with cornbread, rice, or mashed potatoes
-
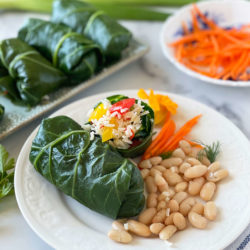
Collard Green Wraps
Ingredients
- 6-8 Large Collard Greens
- 2 cups Jasmine Rice
- 1 cup Fresh Peas or Frozen
- 1 cup Fresh Cauliflower
- 1 cup Fresh Corn
- 1 cup Fresh Peppers
- 1 bunch Fresh Dill
- 1 bunch Fresh Parsely
Sides
- 2 cups Cannellini Beans
- 2 cups Fresh Corn
Instructions
- Make stir-fry: Heat the 1 teaspoon of olive oil in a medium skillet over medium heat. Add the cooked rice and vegetables (whatever you have on hard) and stir-fry. This should take 10 minutes. In a deep skillet, bring 1 to 2 inches of water to a boil. Reduce the heat to a simmer and, one at a time, dip each collard green leaf in the water until just softened, about 10 to 20 seconds, or until bright green. Set on towels to dry.Assemble the burritos: Trim the thick part of the stem from the collard leaves. Fill each burrito with your stir-fry. Add the sides of cannellini beans and corn to the plate.
0 Comments