Vegan Puff Pastry (video)
This vegan puff pastry, or pâte feuilletée, is crispy, buttery, and perfect when you’re looking for something light and delicate. This recipe takes you step-by-step through the process of making homemade vegan puff pastry!
![]()
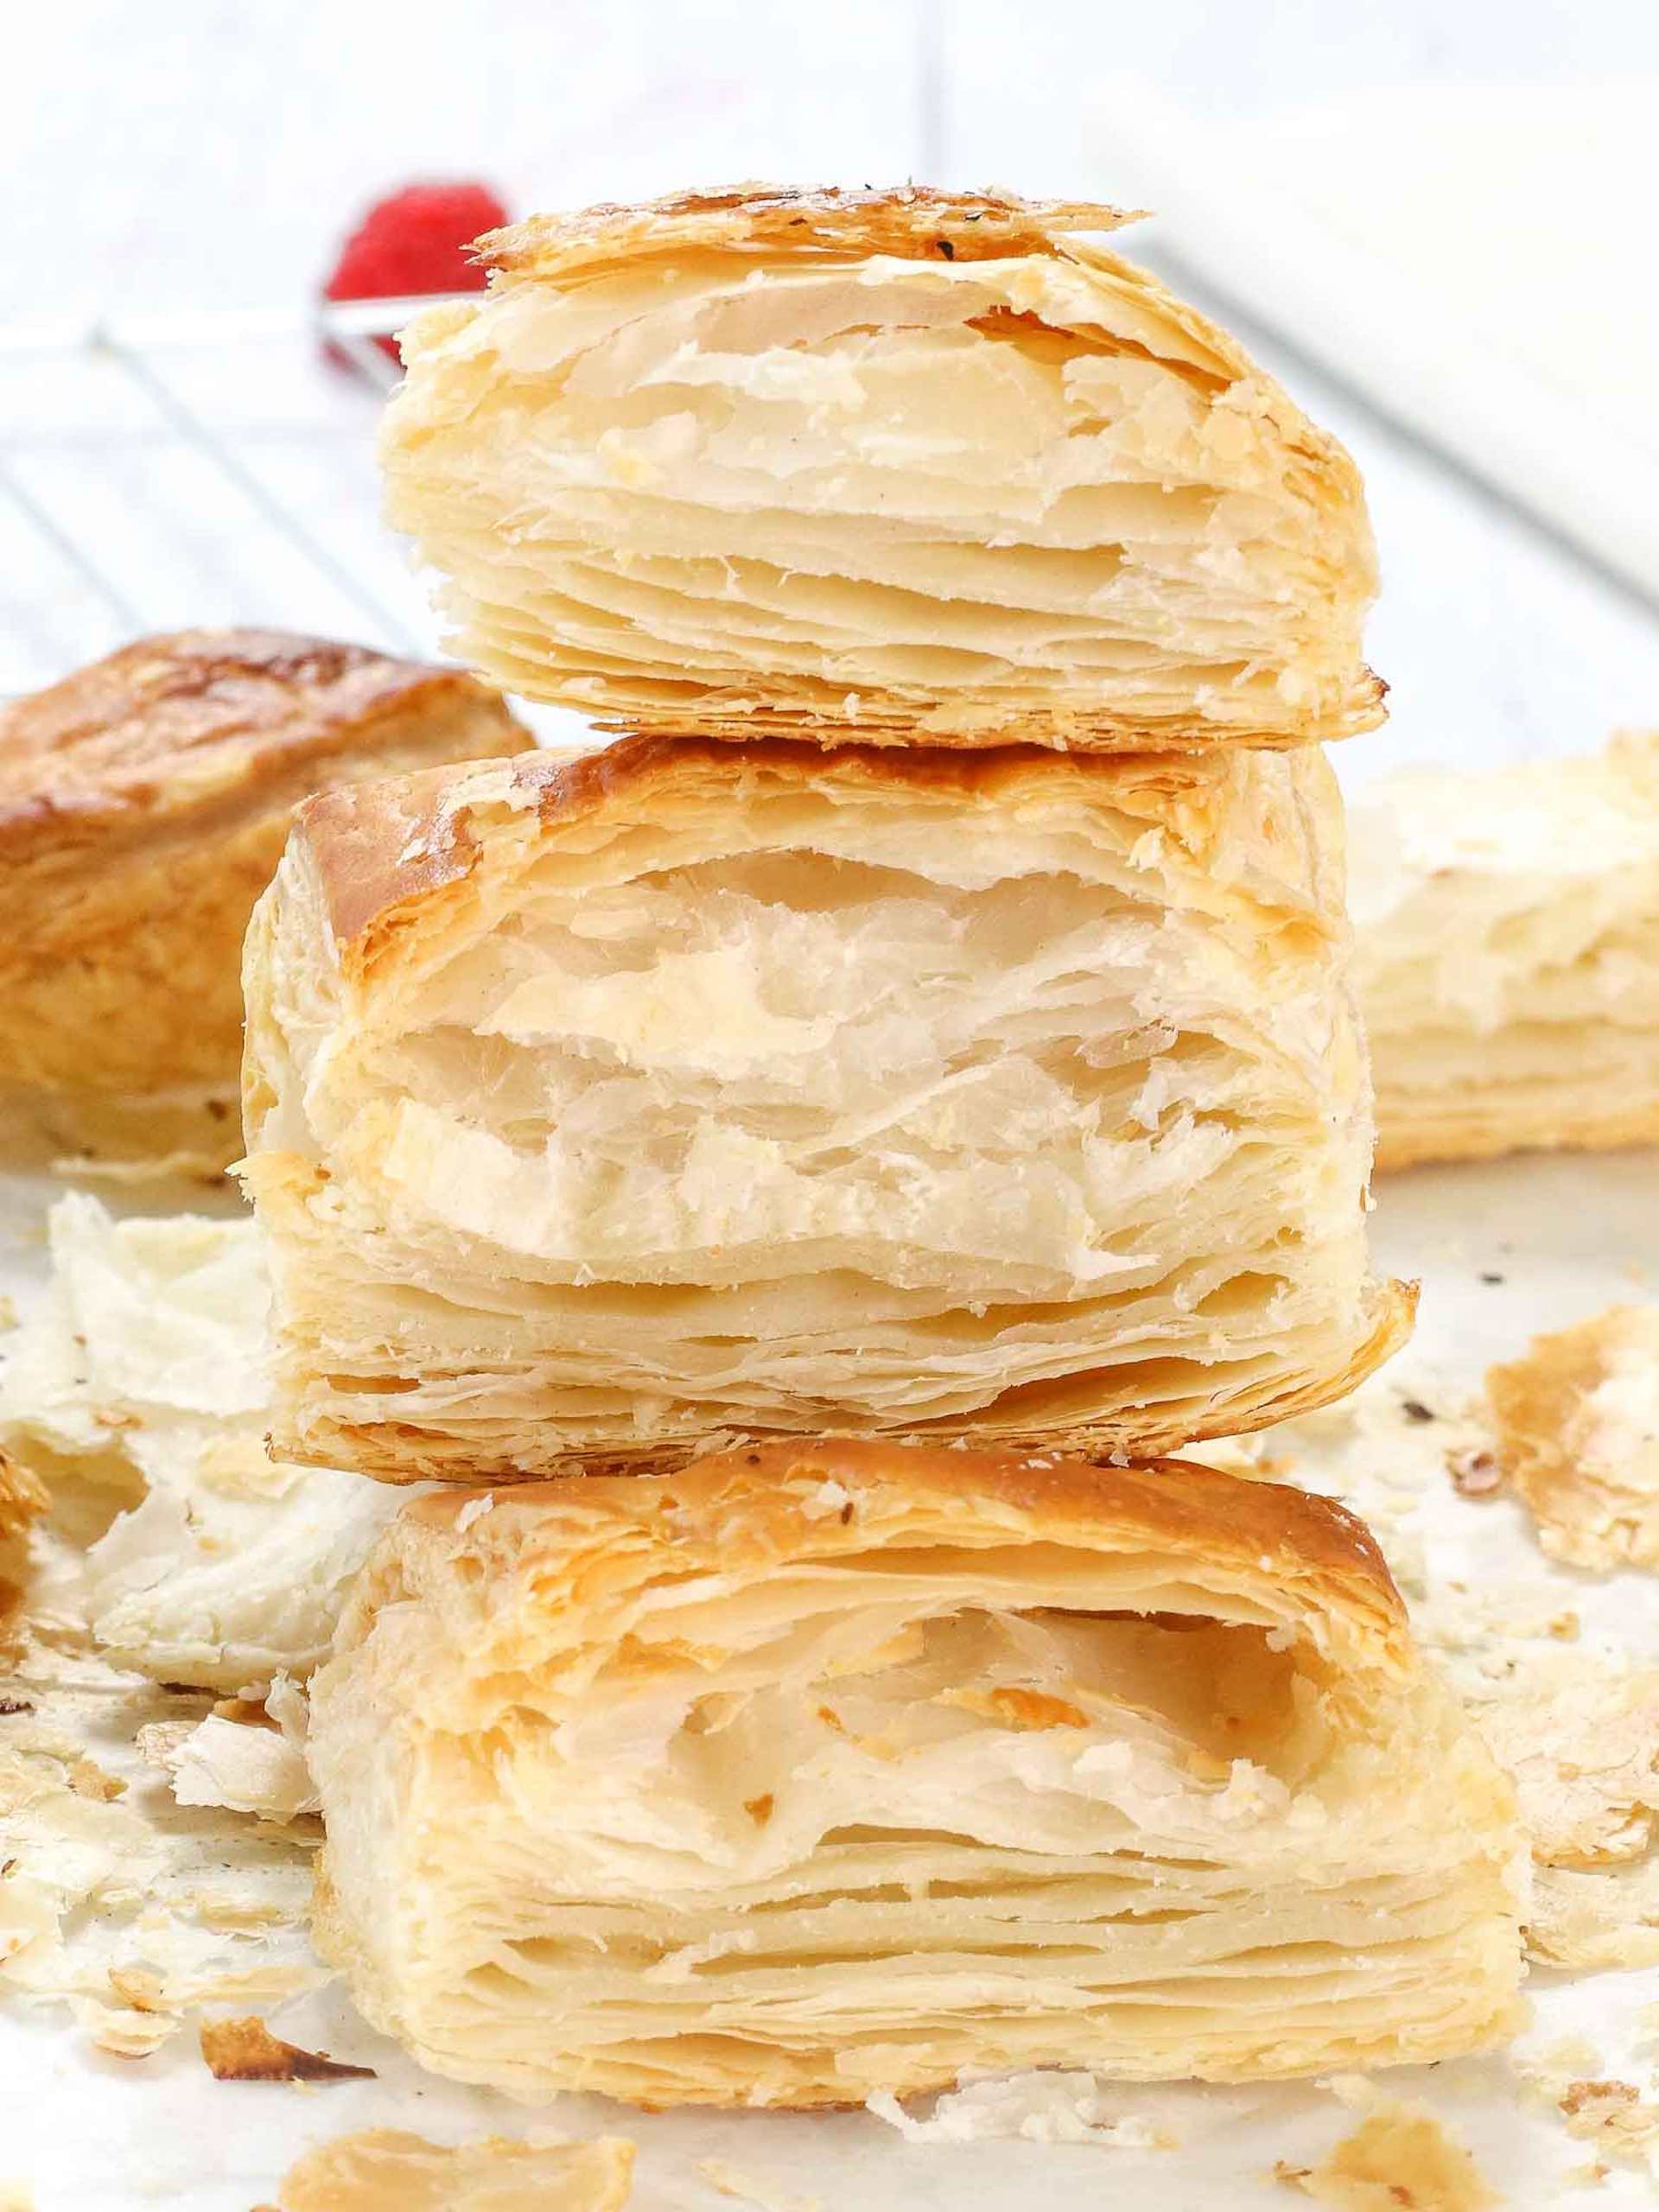
From crispy, flaky turnovers, and fancy fruit tarts to delicate pinwheels, puff pastry is the gold standard when you want something light, crisp, and elegant. If you don’t know, this pastry breaks into a shower of buttery flakes when you bite into it, showering your plate with delicious crumbs! It is time-consuming to make but well worth the effort. After much research (including an online class presented by Shubranshu Bhandoh, a classically trained baker of all things French), I’ve put a vegan twist on his classic recipe, and the results are lovely!
When I think of puff pastry, I think of sophistication. Any baker worth their salt knows how to make pâte feuilletée (puff pastry) from scratch since it’s a French baking classic. Light, airy and elegant, I imagine a delicious French bakery filled with the aromas of cooked jams, bread rising, and cookies baking. Skilled pastry chefs roll out the thin layers of dough while seamlessly sprinkling butter between each layer. The French refer to this as lamination.
If this feels out of reach for you, don’t worry! The ingredients are probably already in your kitchen, and it’s very straightforward, and you don’t need to be intimidated. Puff pastry is one of the wonders of a baker’s kitchen, and you can enjoy it too. Follow the puff pastry recipe below, which I can vouch for myself!
*Important Note: Classic French pastry chefs make puff pastry with European butter with a fat content of 82% or more. The butter sold in the US is commonly around 78%-80% fat content, which makes a BIG difference in the flakiness and crispiness of your puff pastry. On that same line of thinking, vegan butter products have less than 80% fat content, making the puff pastry much less predictable. Many vegan pastry chefs use shortening instead. Palm oil shortening is commonly used to make vegan puff pastry. We use both depending on the pastry we’re making at the time. The step-by-step recipe below accounts for both vegan butter and shortening. We use them interchangeably, knowing there will be slight differences in. the final product.
Reasons You’ll Love This Vegan Puff Pastry Recipe
There are many, but here are a few.
-
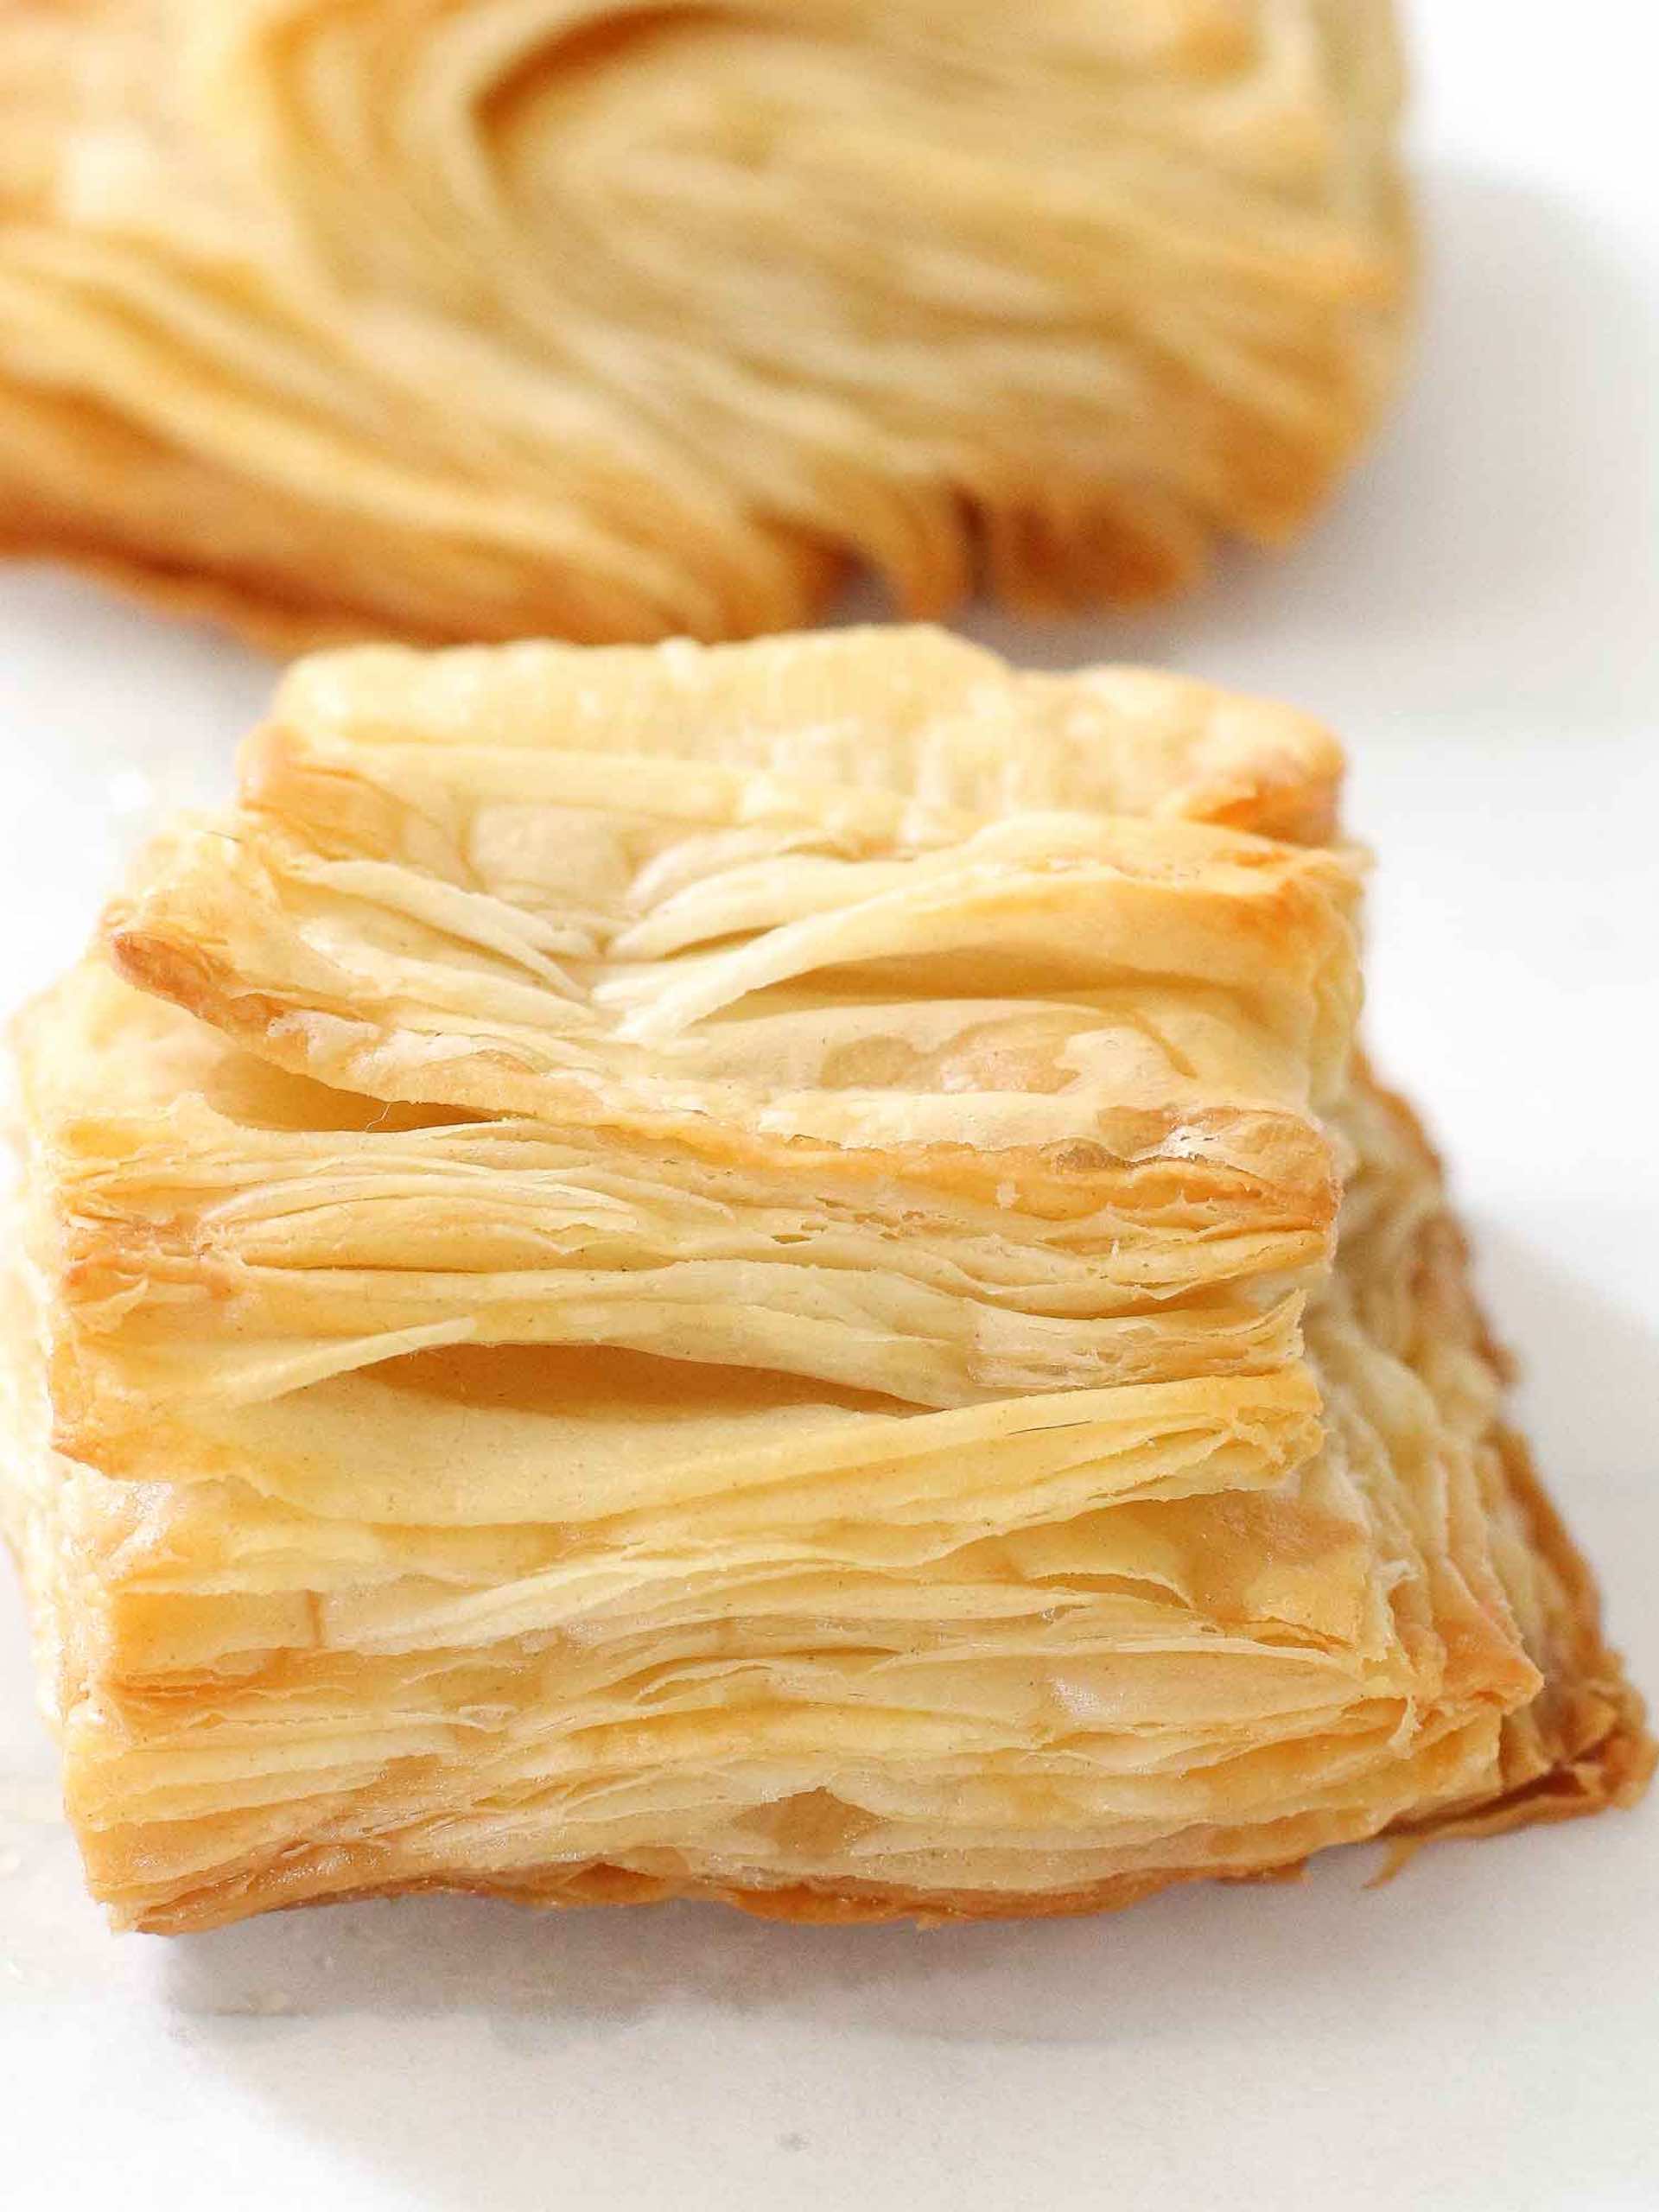
- It’s beautiful! Puff pastry is gorgeous and looks intricately woven. The French have this down to a science, but you can make this elegant puff pastry too.
- It’s mouthwatering! Puff pastry has textures; it’s flaky, buttery, and soft. It elevates almost any dish or dessert.
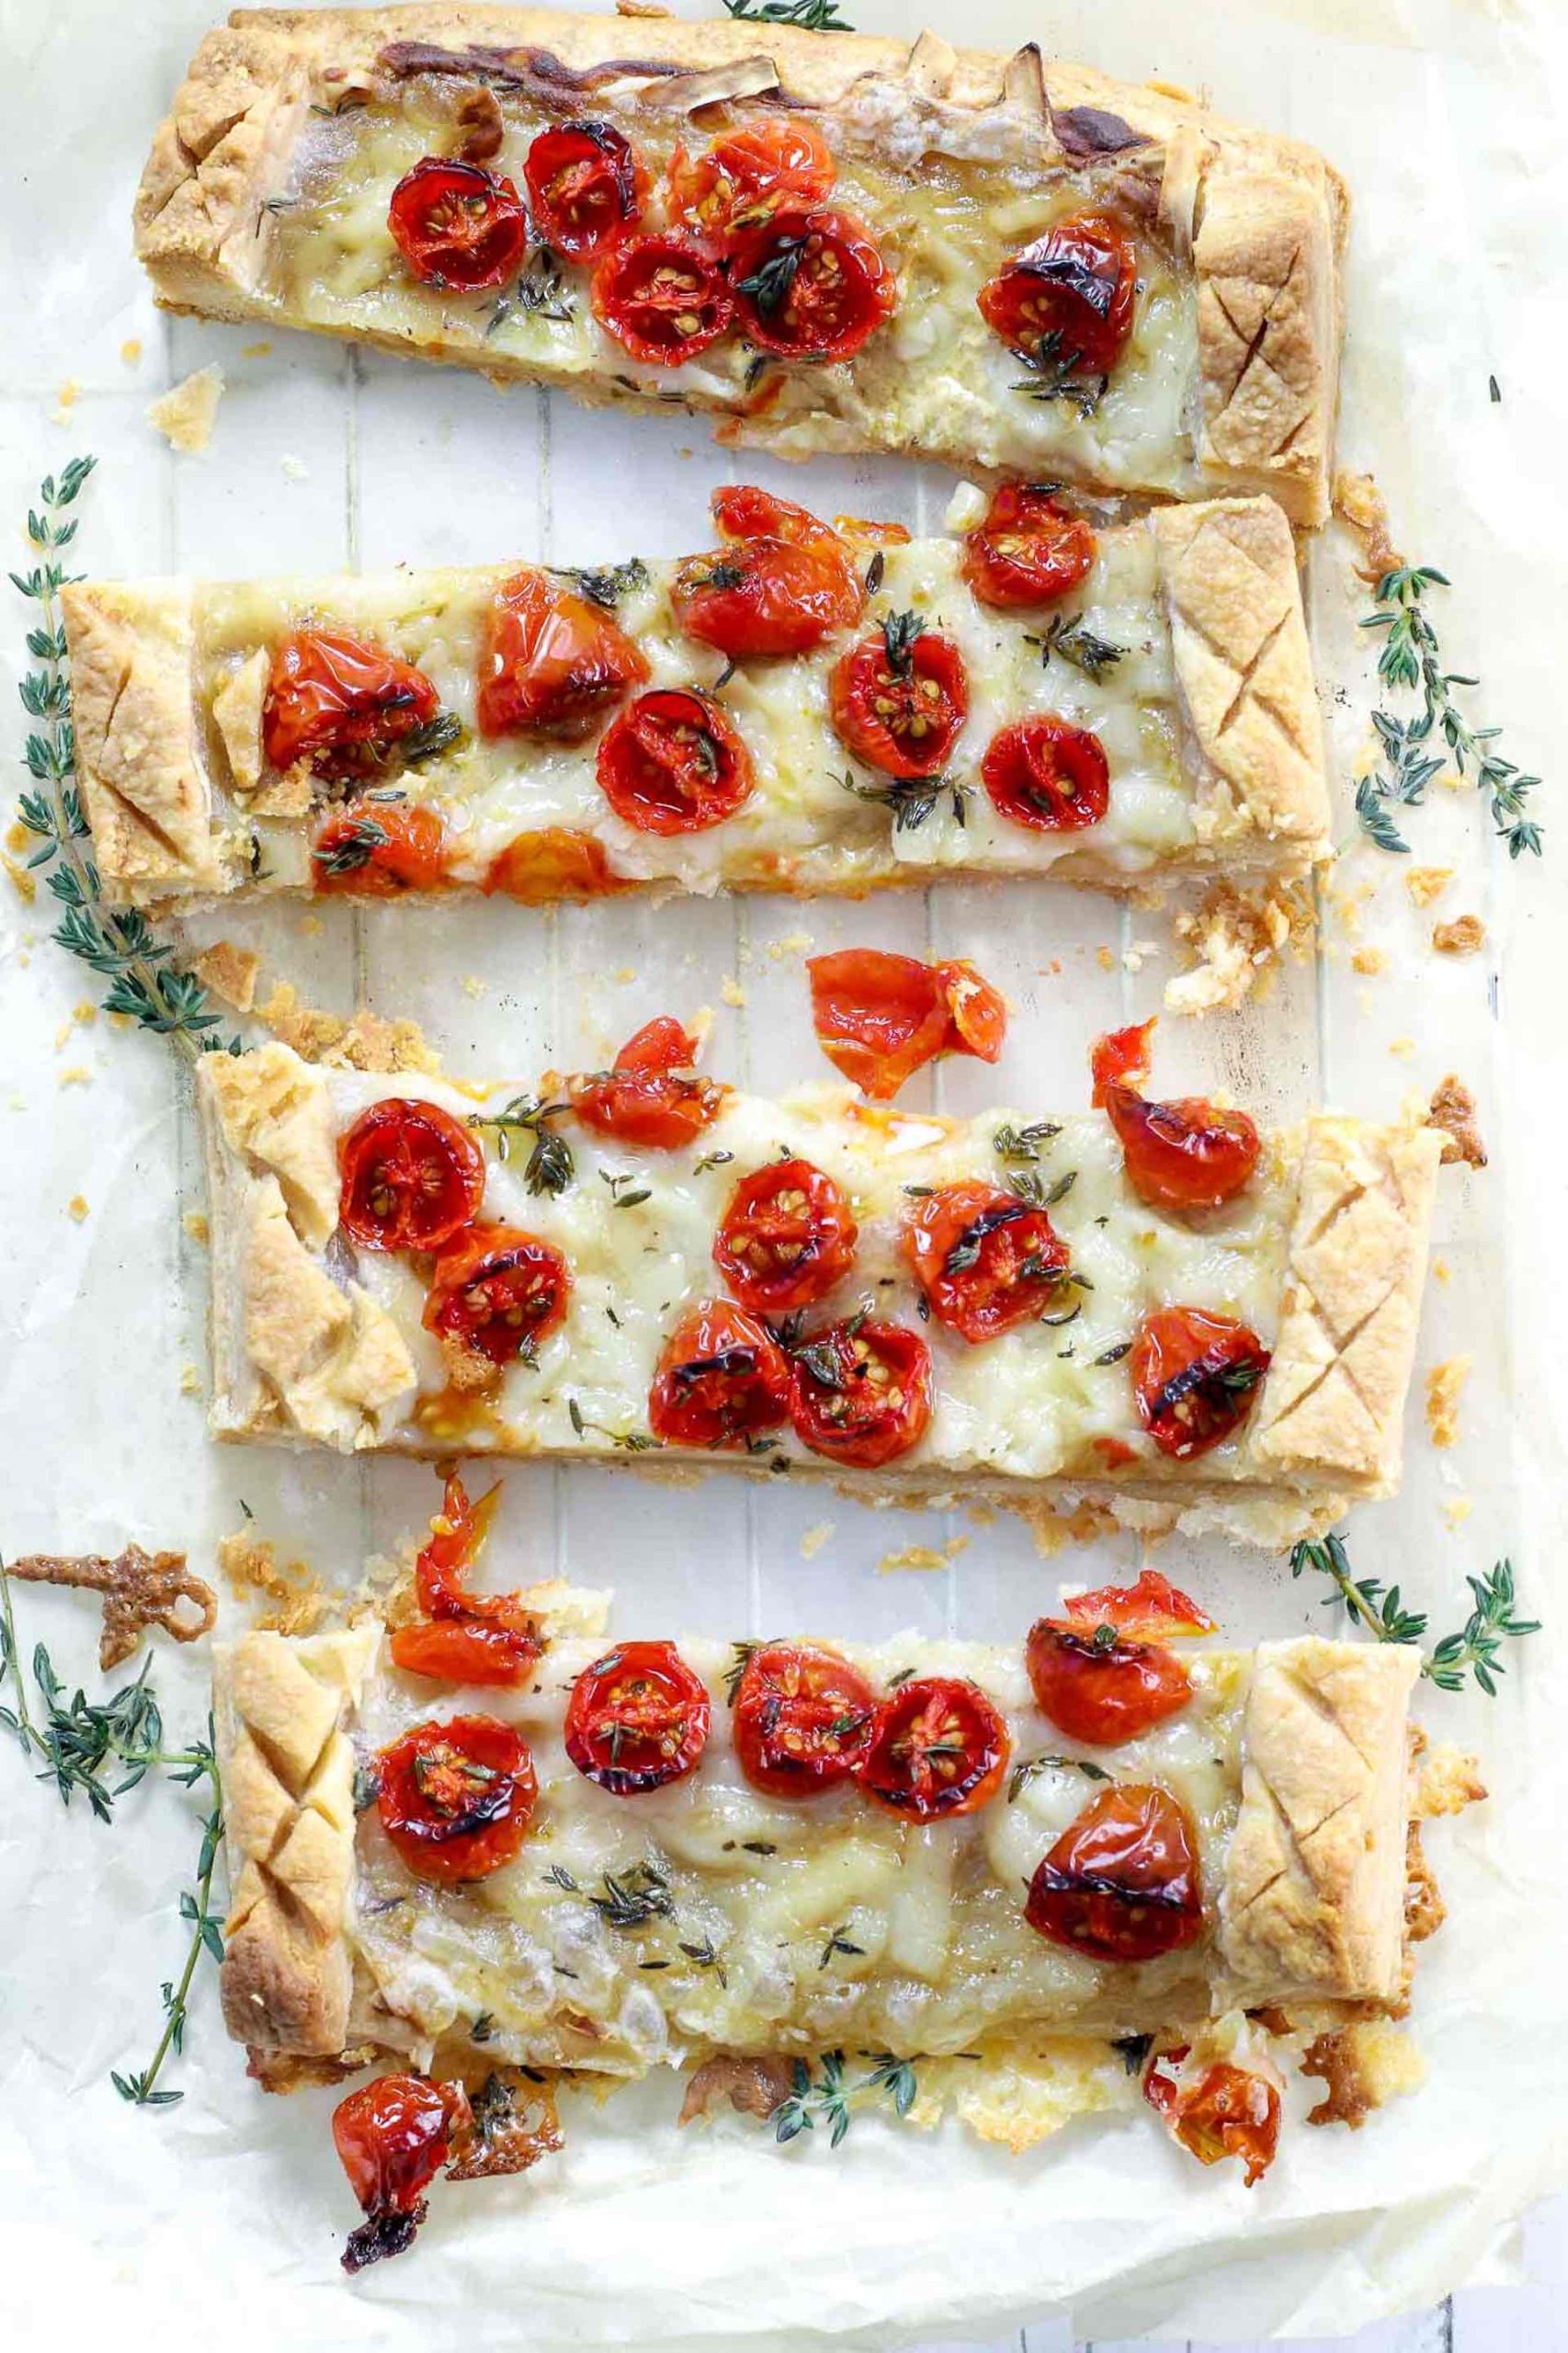
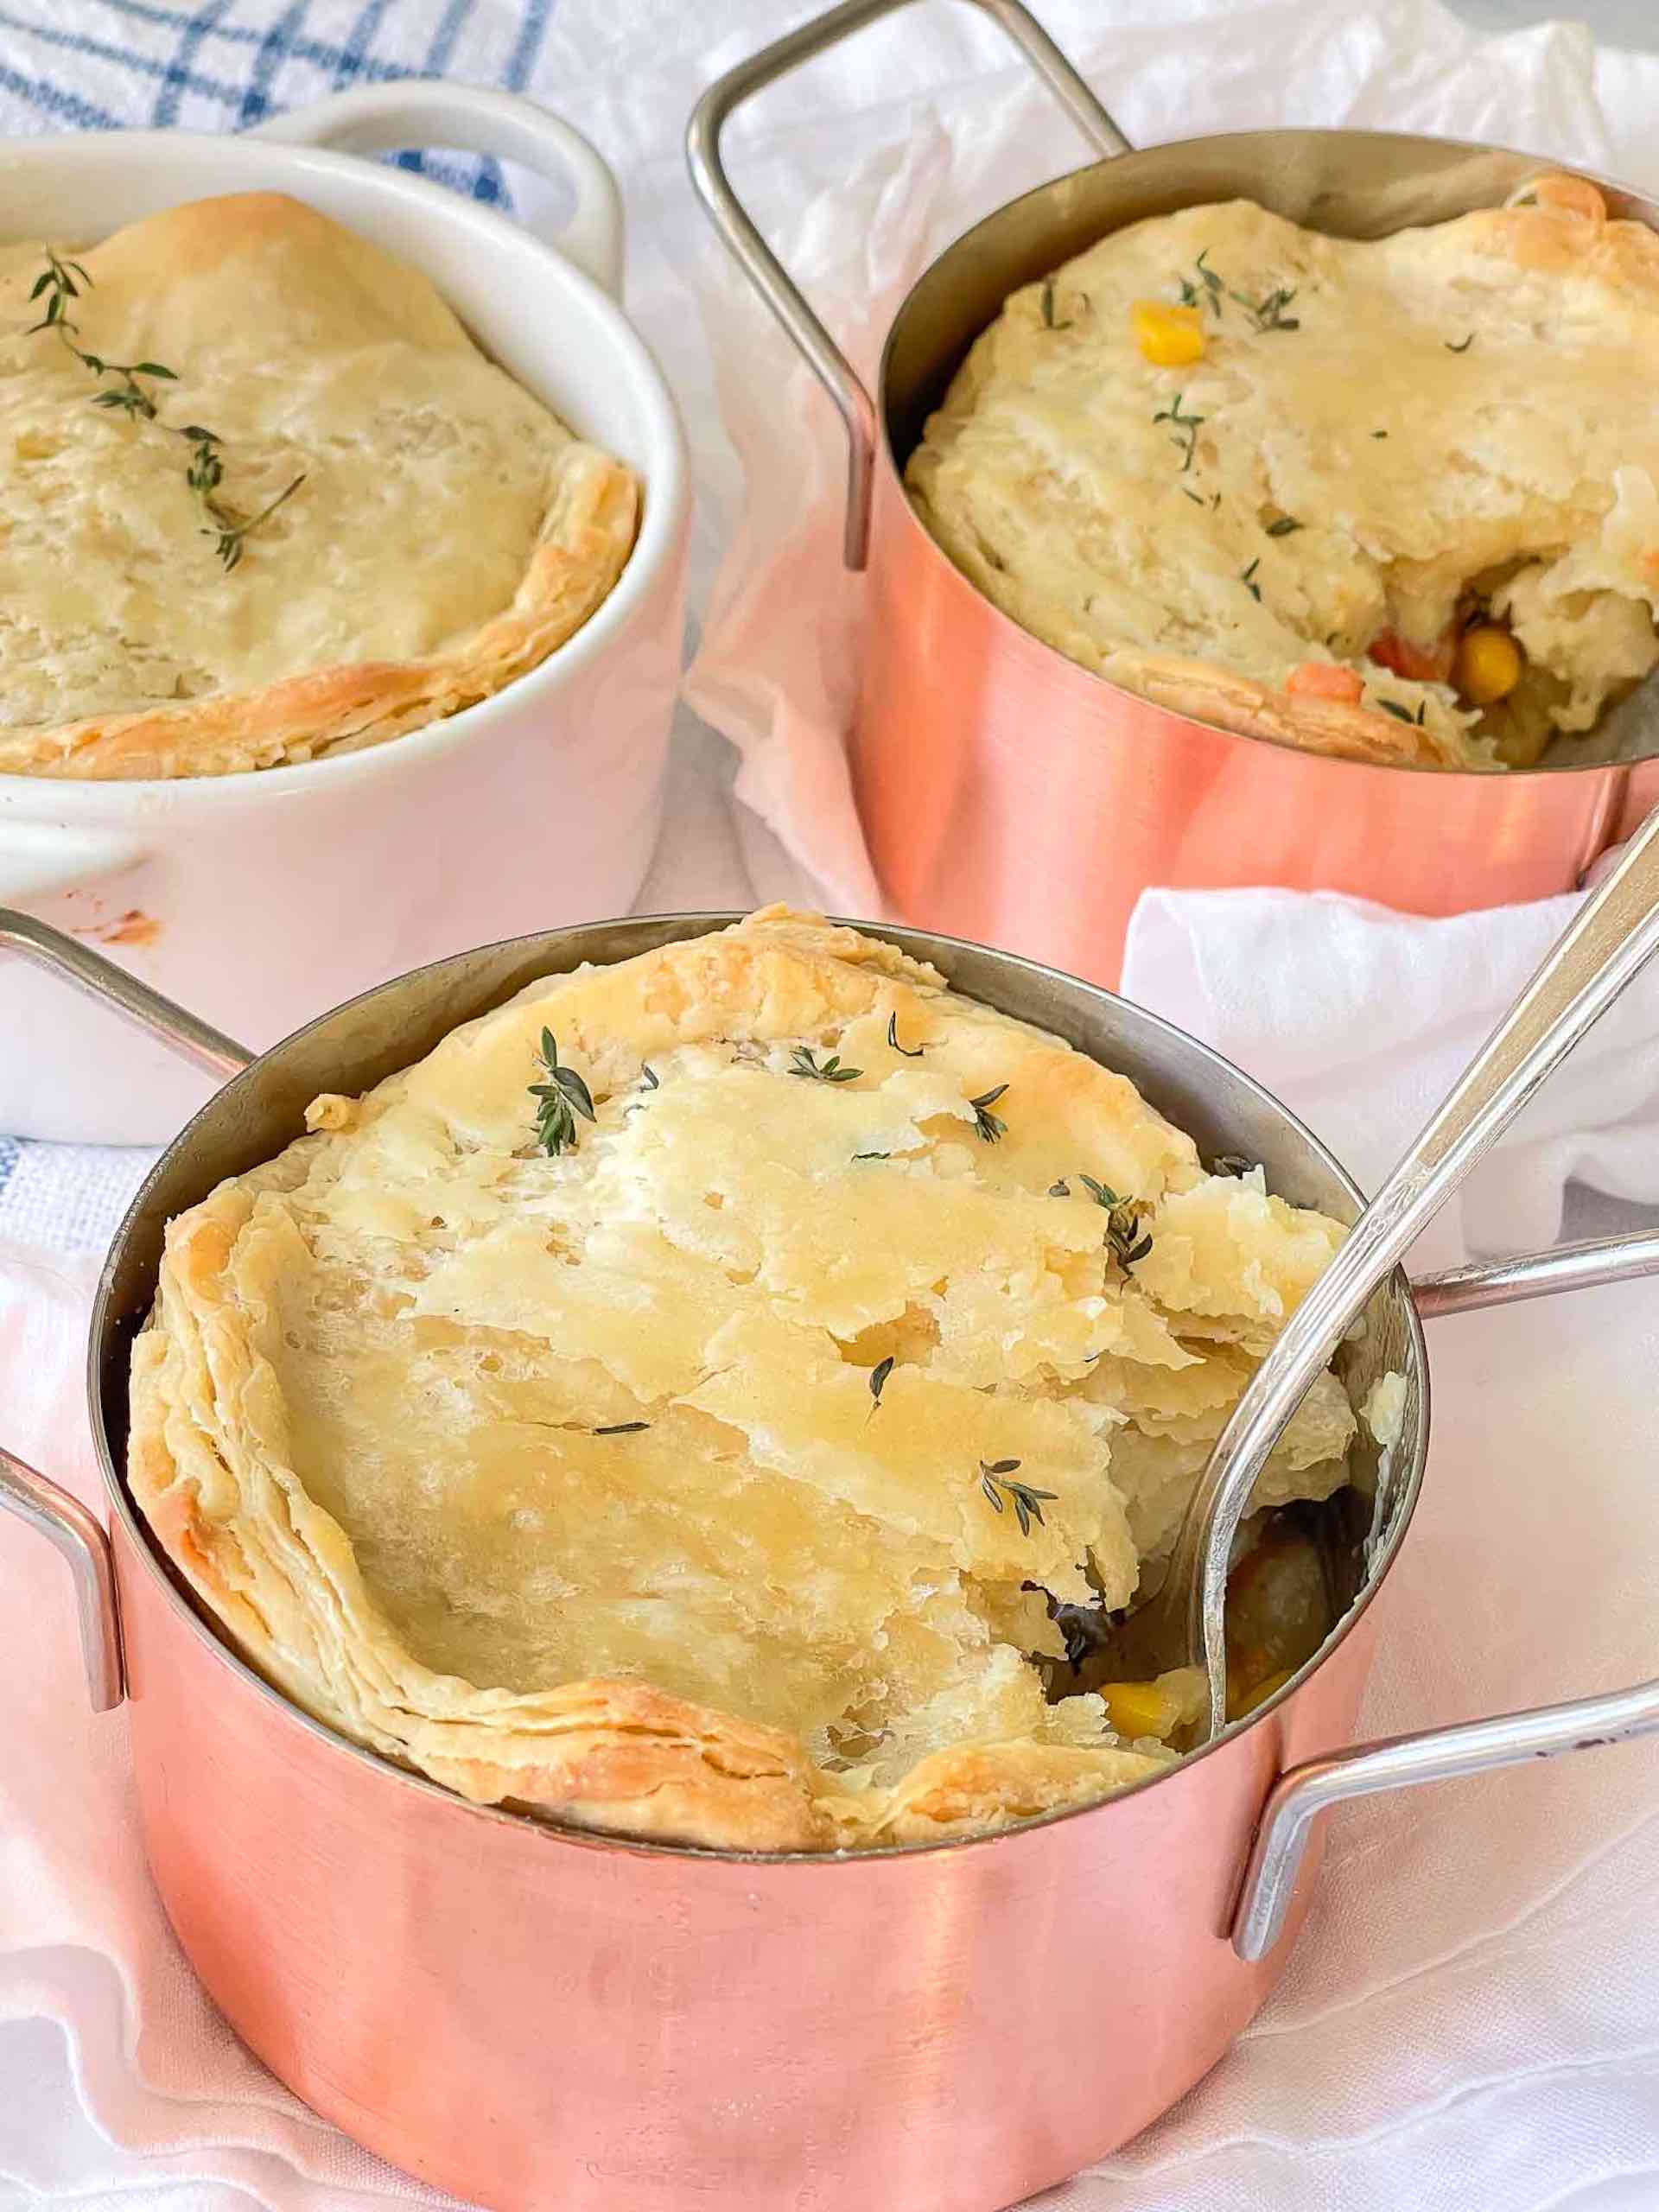
- It’s versatile. You can use puff pastry for anything savory or sweet, and we love it with Vegan Pot Pie, Mini Apple Pie with Puff Pastry, and Vegan Puff Pastry Tomato Tart.
Vegan Puff Pastry Ingredients and Equipment
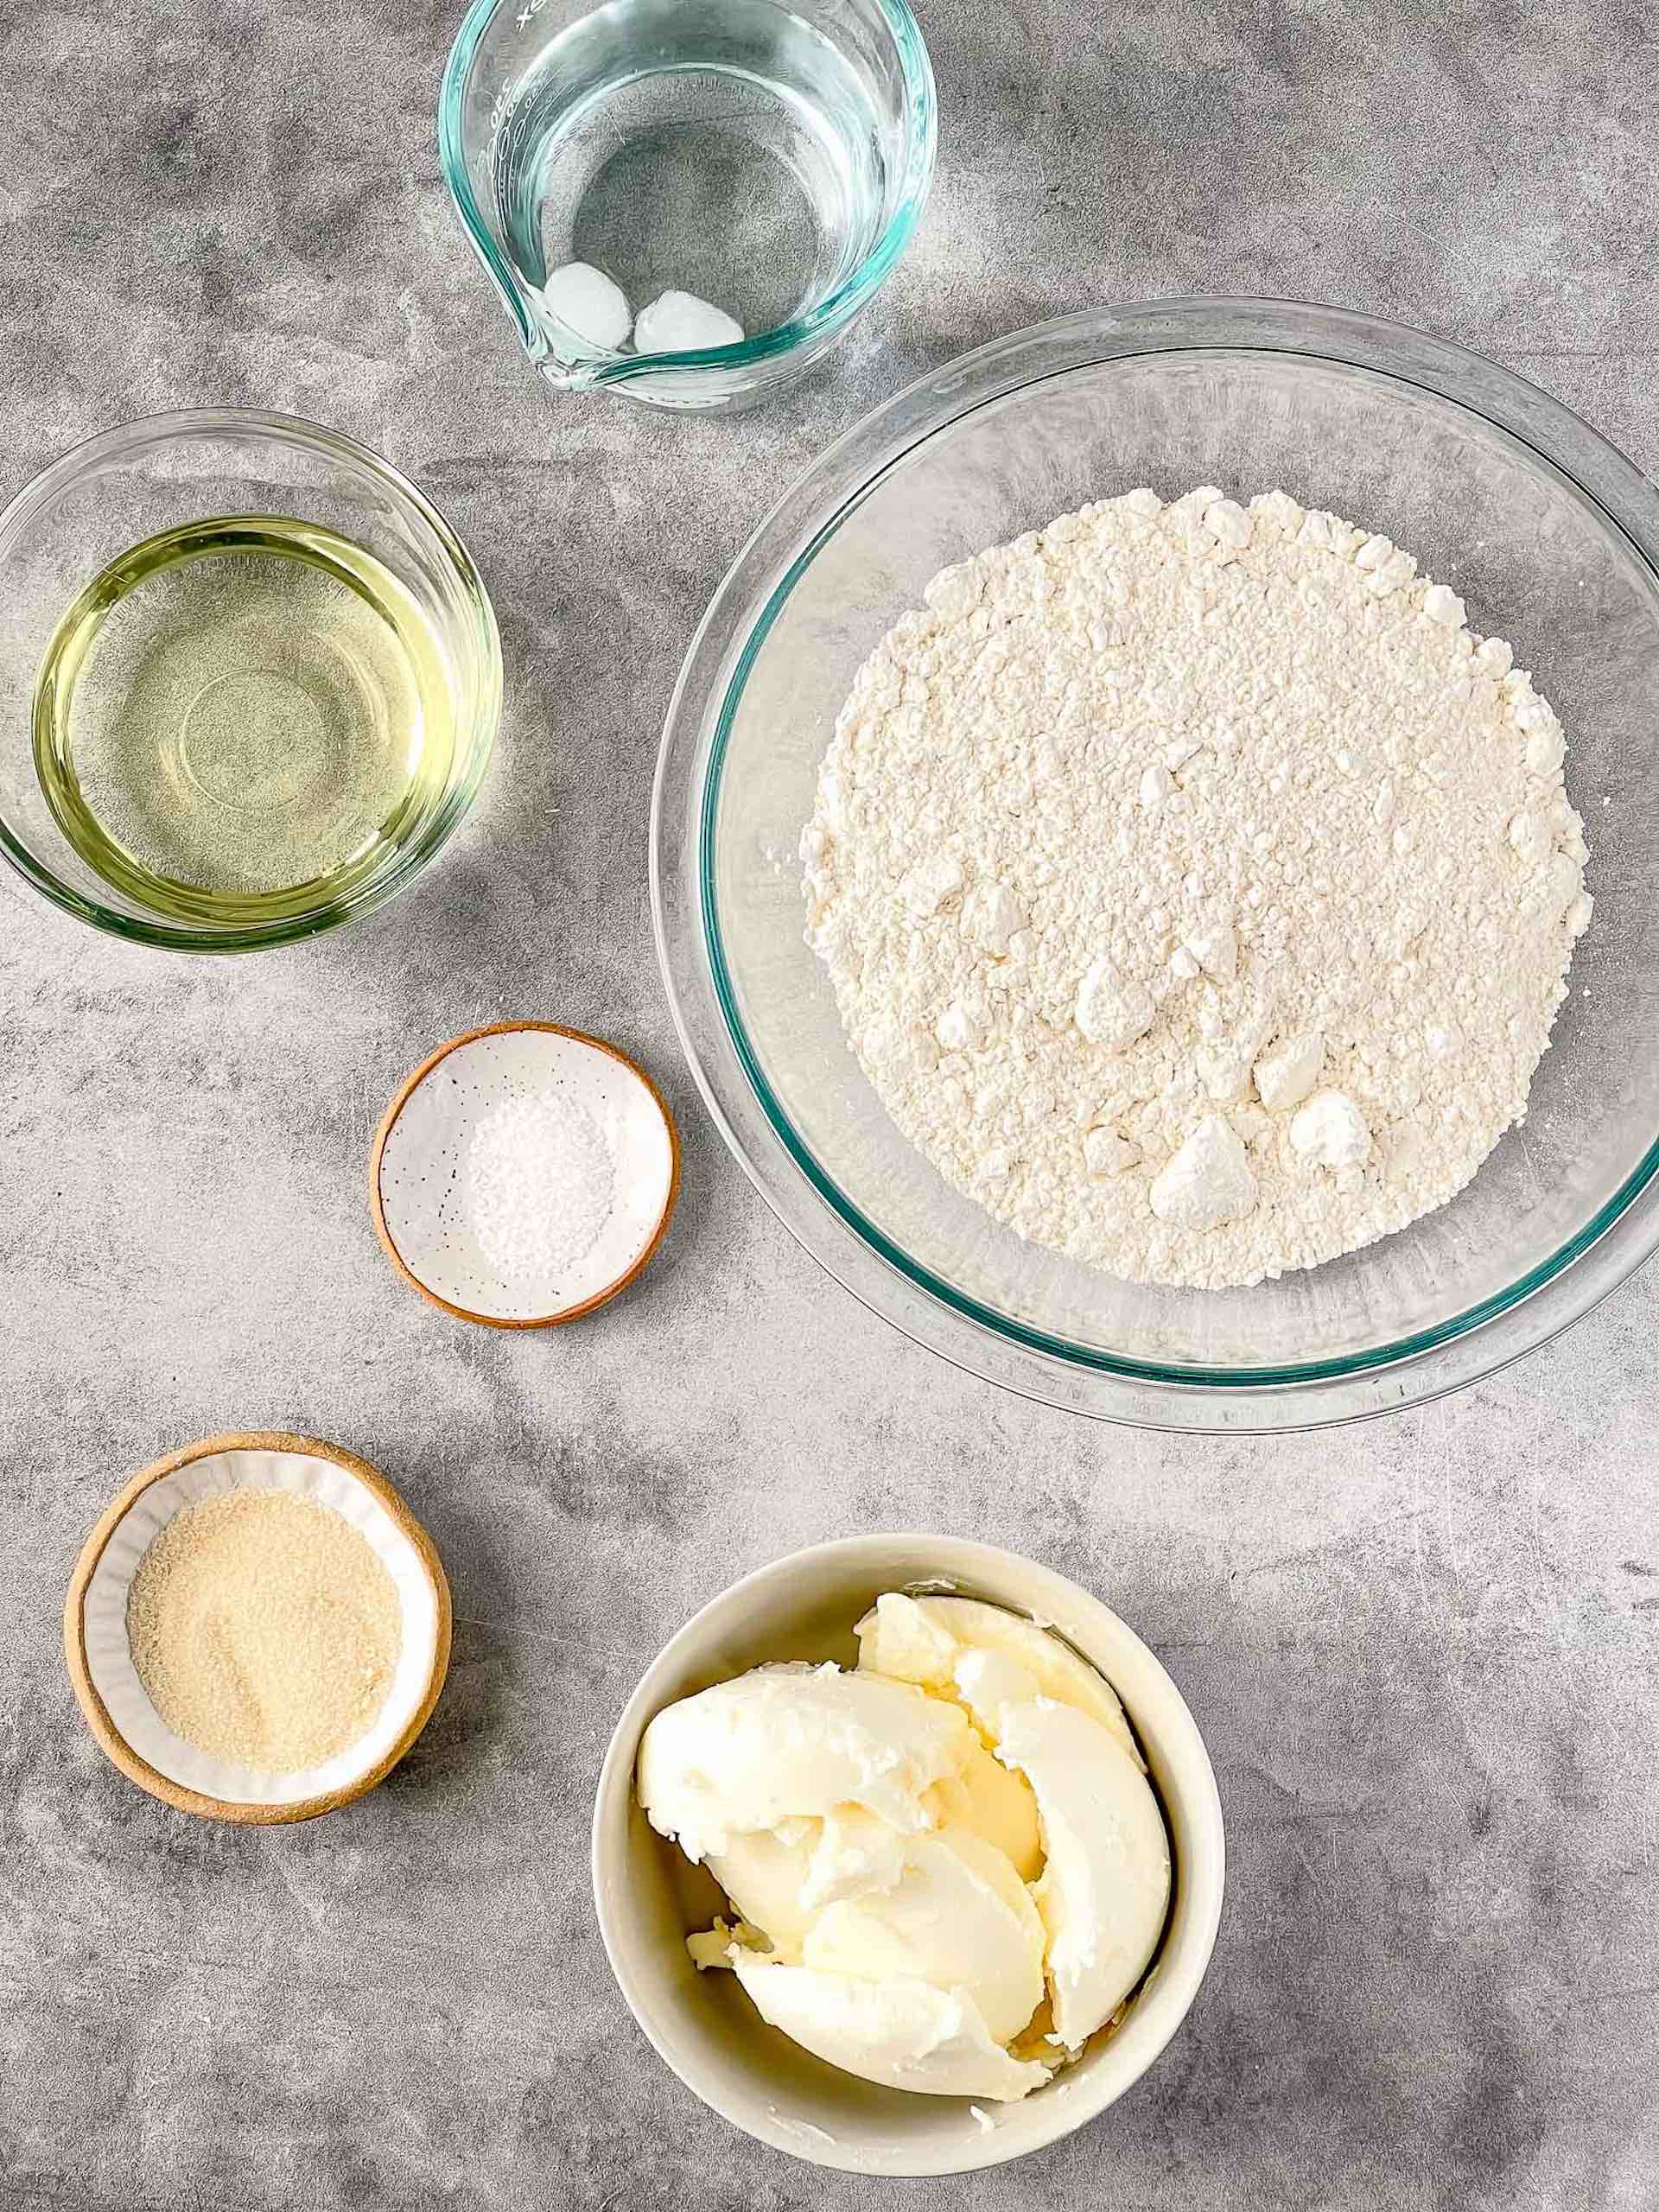
There are only five ingredients, including water.
-
-
- Flour – I generally use all-purpose flour enriched and unbleached. AP flour makes a tender vegan puff pastry dough and has enough gluten to make it elastic and workable.
- Vegan butter/shortening / neutral oil – I usually use my own butter, but I also really like Earth Balance butter sticks, palm oil sticks, Crisco sticks, or a neutral oil such as canola oil. Butter/shortening also works as a tenderizer for your vegan puff pastry making your vegan puff pastry dough tender and flaky. When the butter/shortening gets baked in the oven, the moisture in the butter/shortening evaporates and causes the pastry to rise.
- Vinegar – Vinegar prevents oxidization and keeps your dough looking fresh.
- Salt – Salt preserves your dough so it doesn’t get oxidized and it will last longer.
- Very cold water – We want to keep the dough as cold as possible and the cold water helps the butter to stay firm.
-
How to Make Vegan Puff Pastry
Follow these step-by-step instructions for vegan puff pastry dough.
STEP ONE – MAKE THE DOUGH (détrempe)
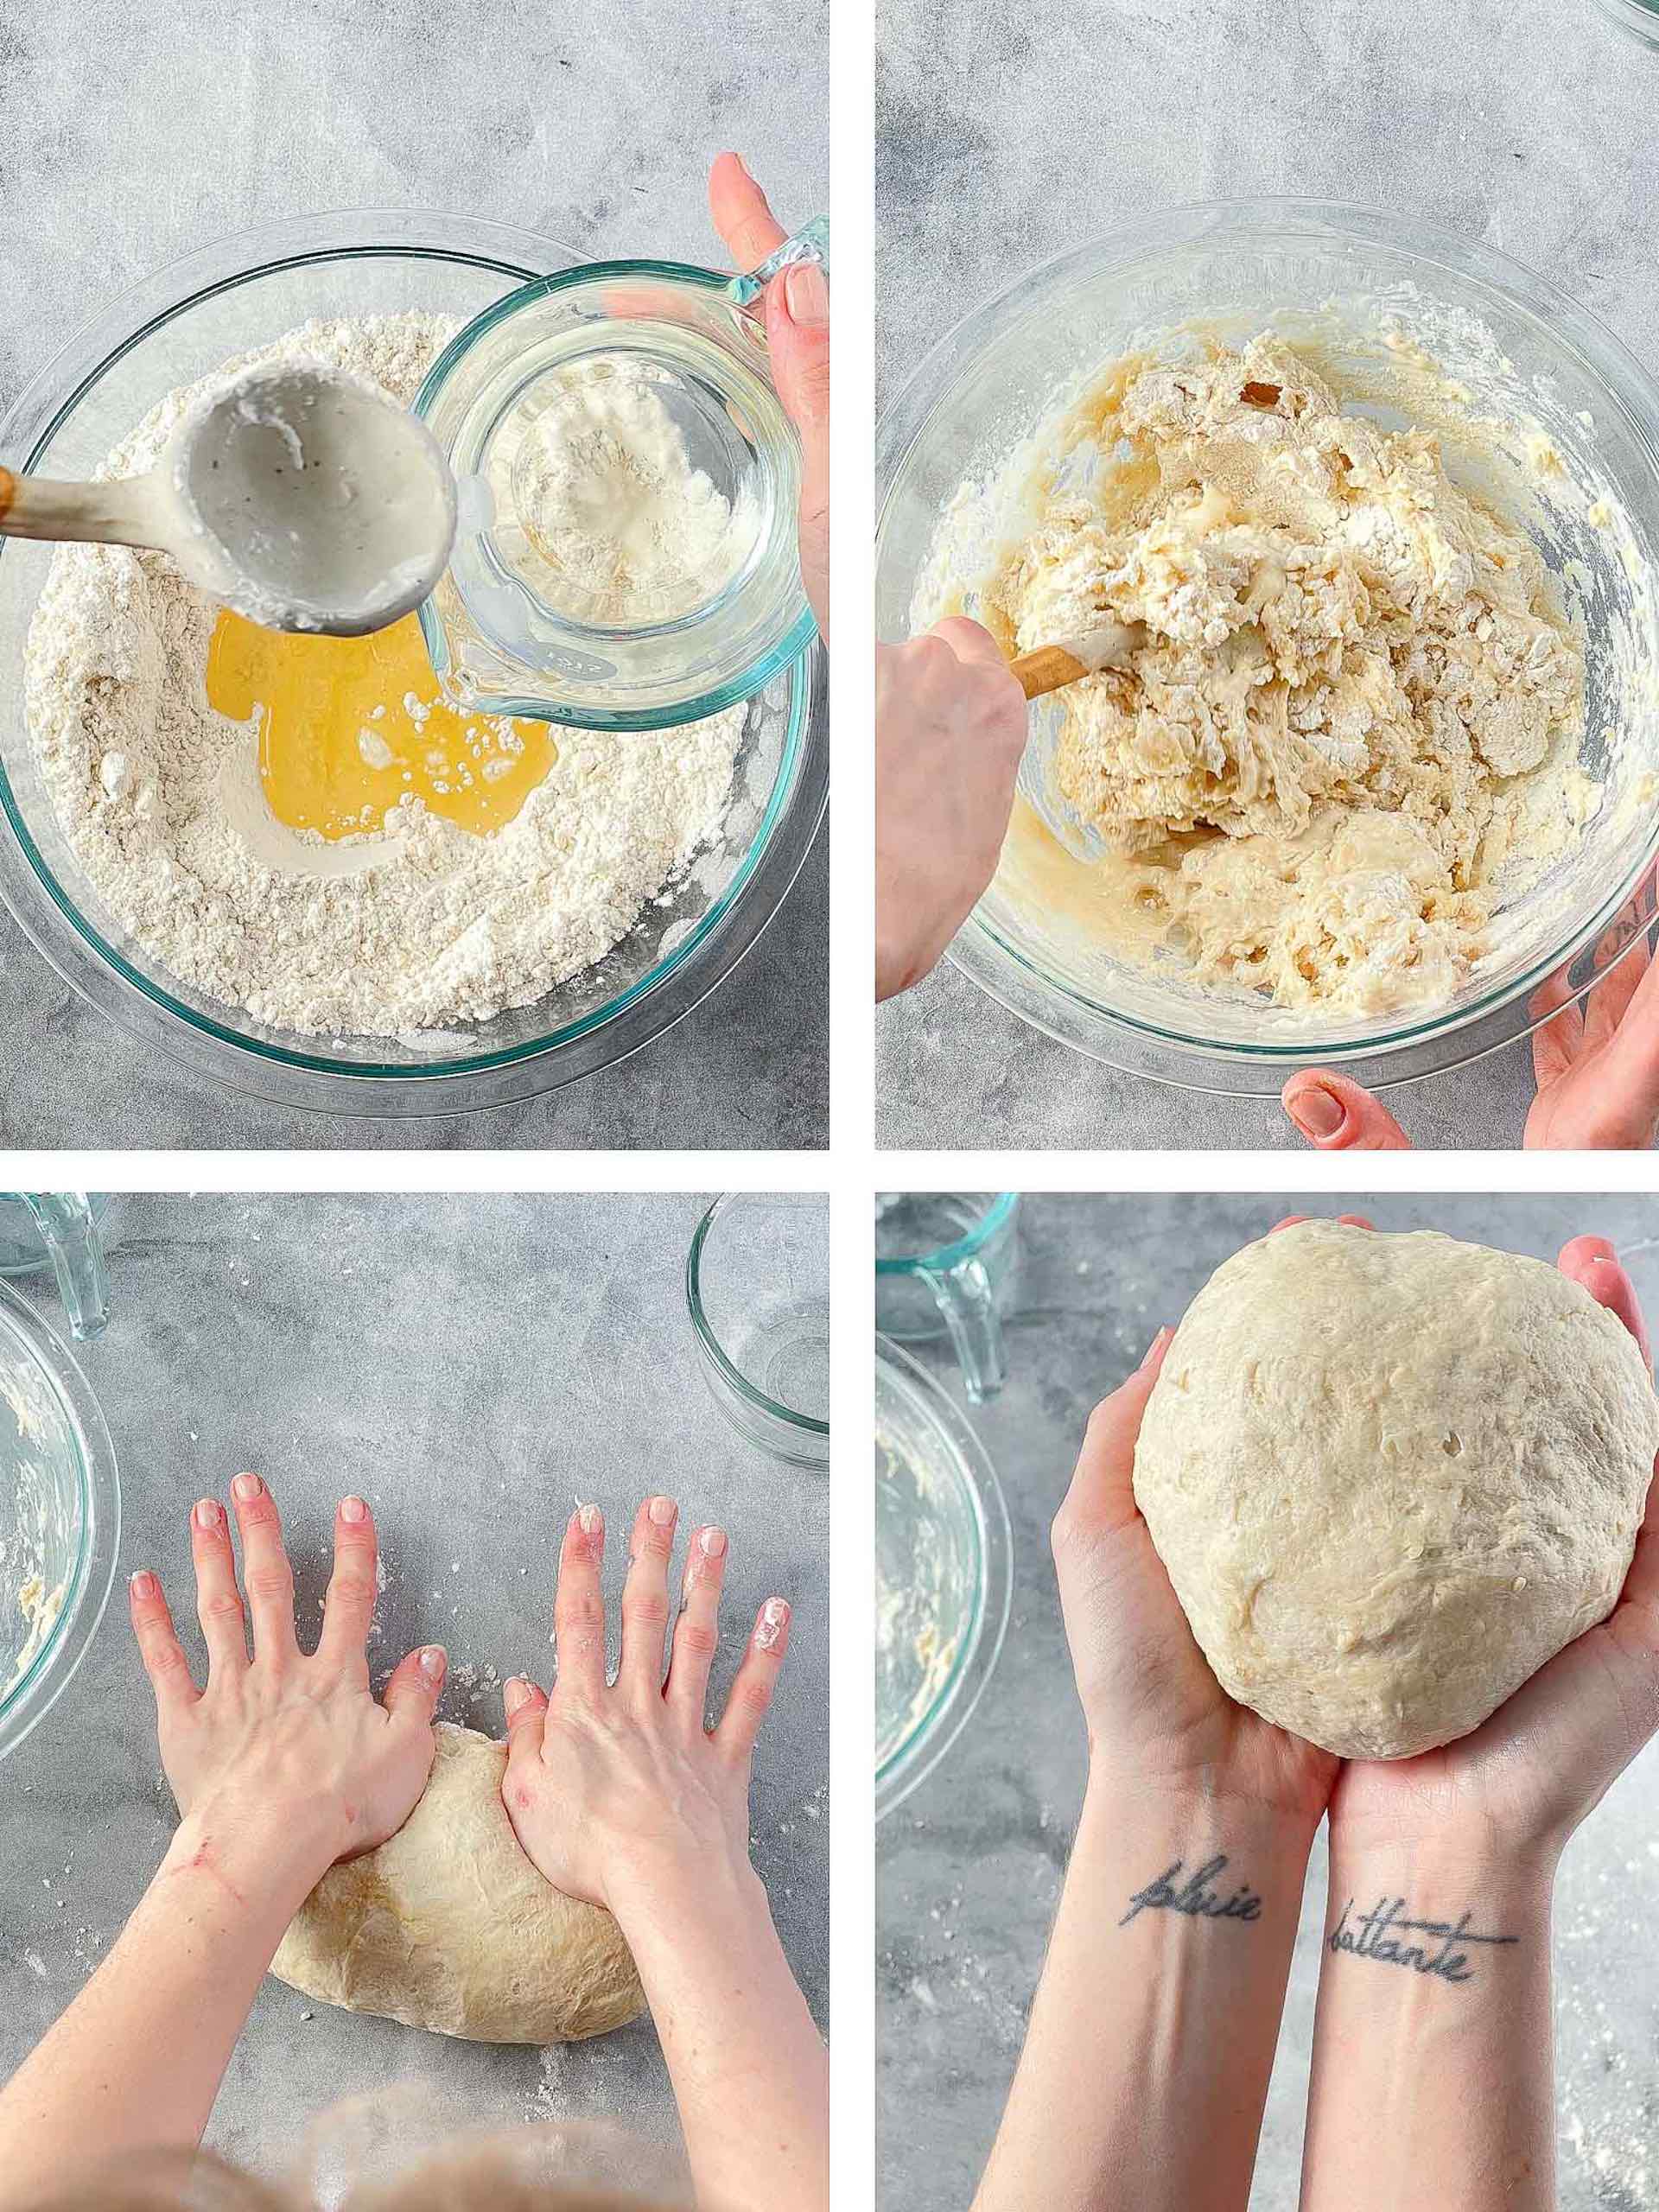
First, making vegan puff pastry dough is relatively easy. Mix all the ingredients together in a bowl and make a rough dough. Keep the dough a bit dry – don’t add too much water. This will help you get lovely layers later on. Keep mixing until the bowl is smooth on the inside. Transfer to your workspace and knead the dough for four minutes using the heel of your hand. Then form into a soft ball.
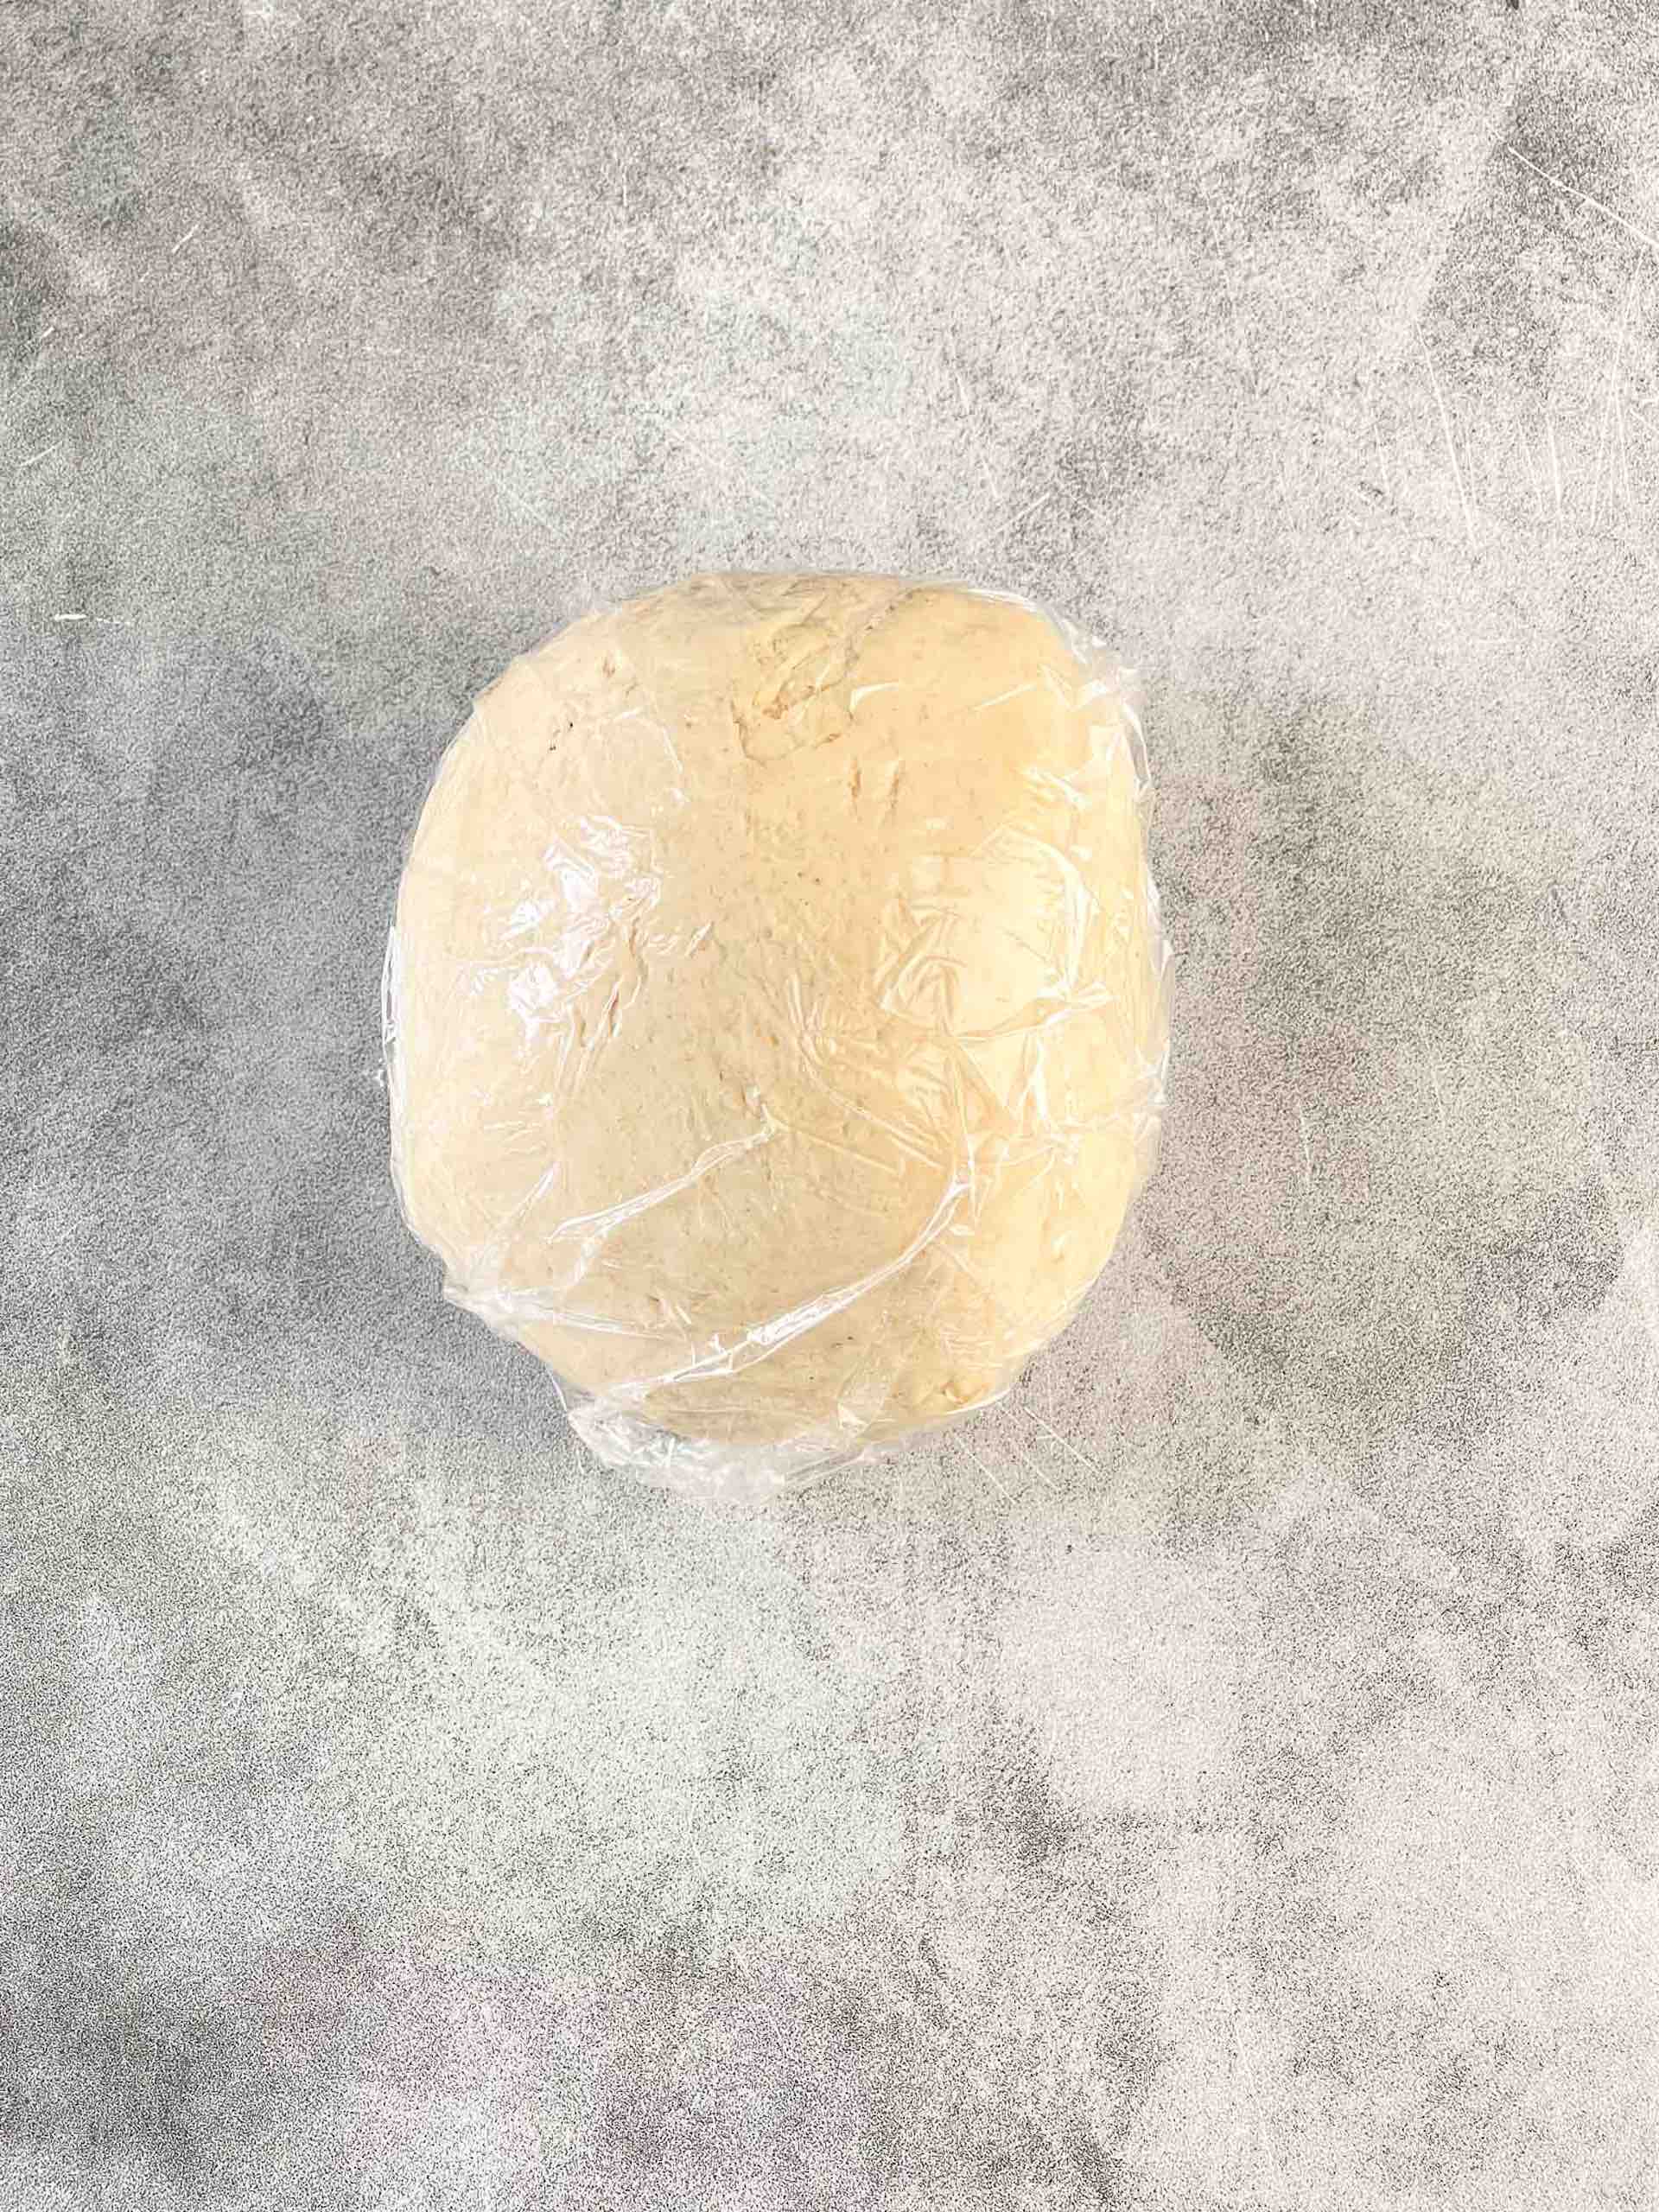
Then, remove the dough from the bowl and wrap it completely with plastic to prevent it from drying. Chill in the refrigerator overnight. (Remember! This is a double batch, so cut your dough in half and store it in two separate balls).
STEP 2 – MAKE THE BUTTER/SHORTENING BLOCK (makes lamination easier!)
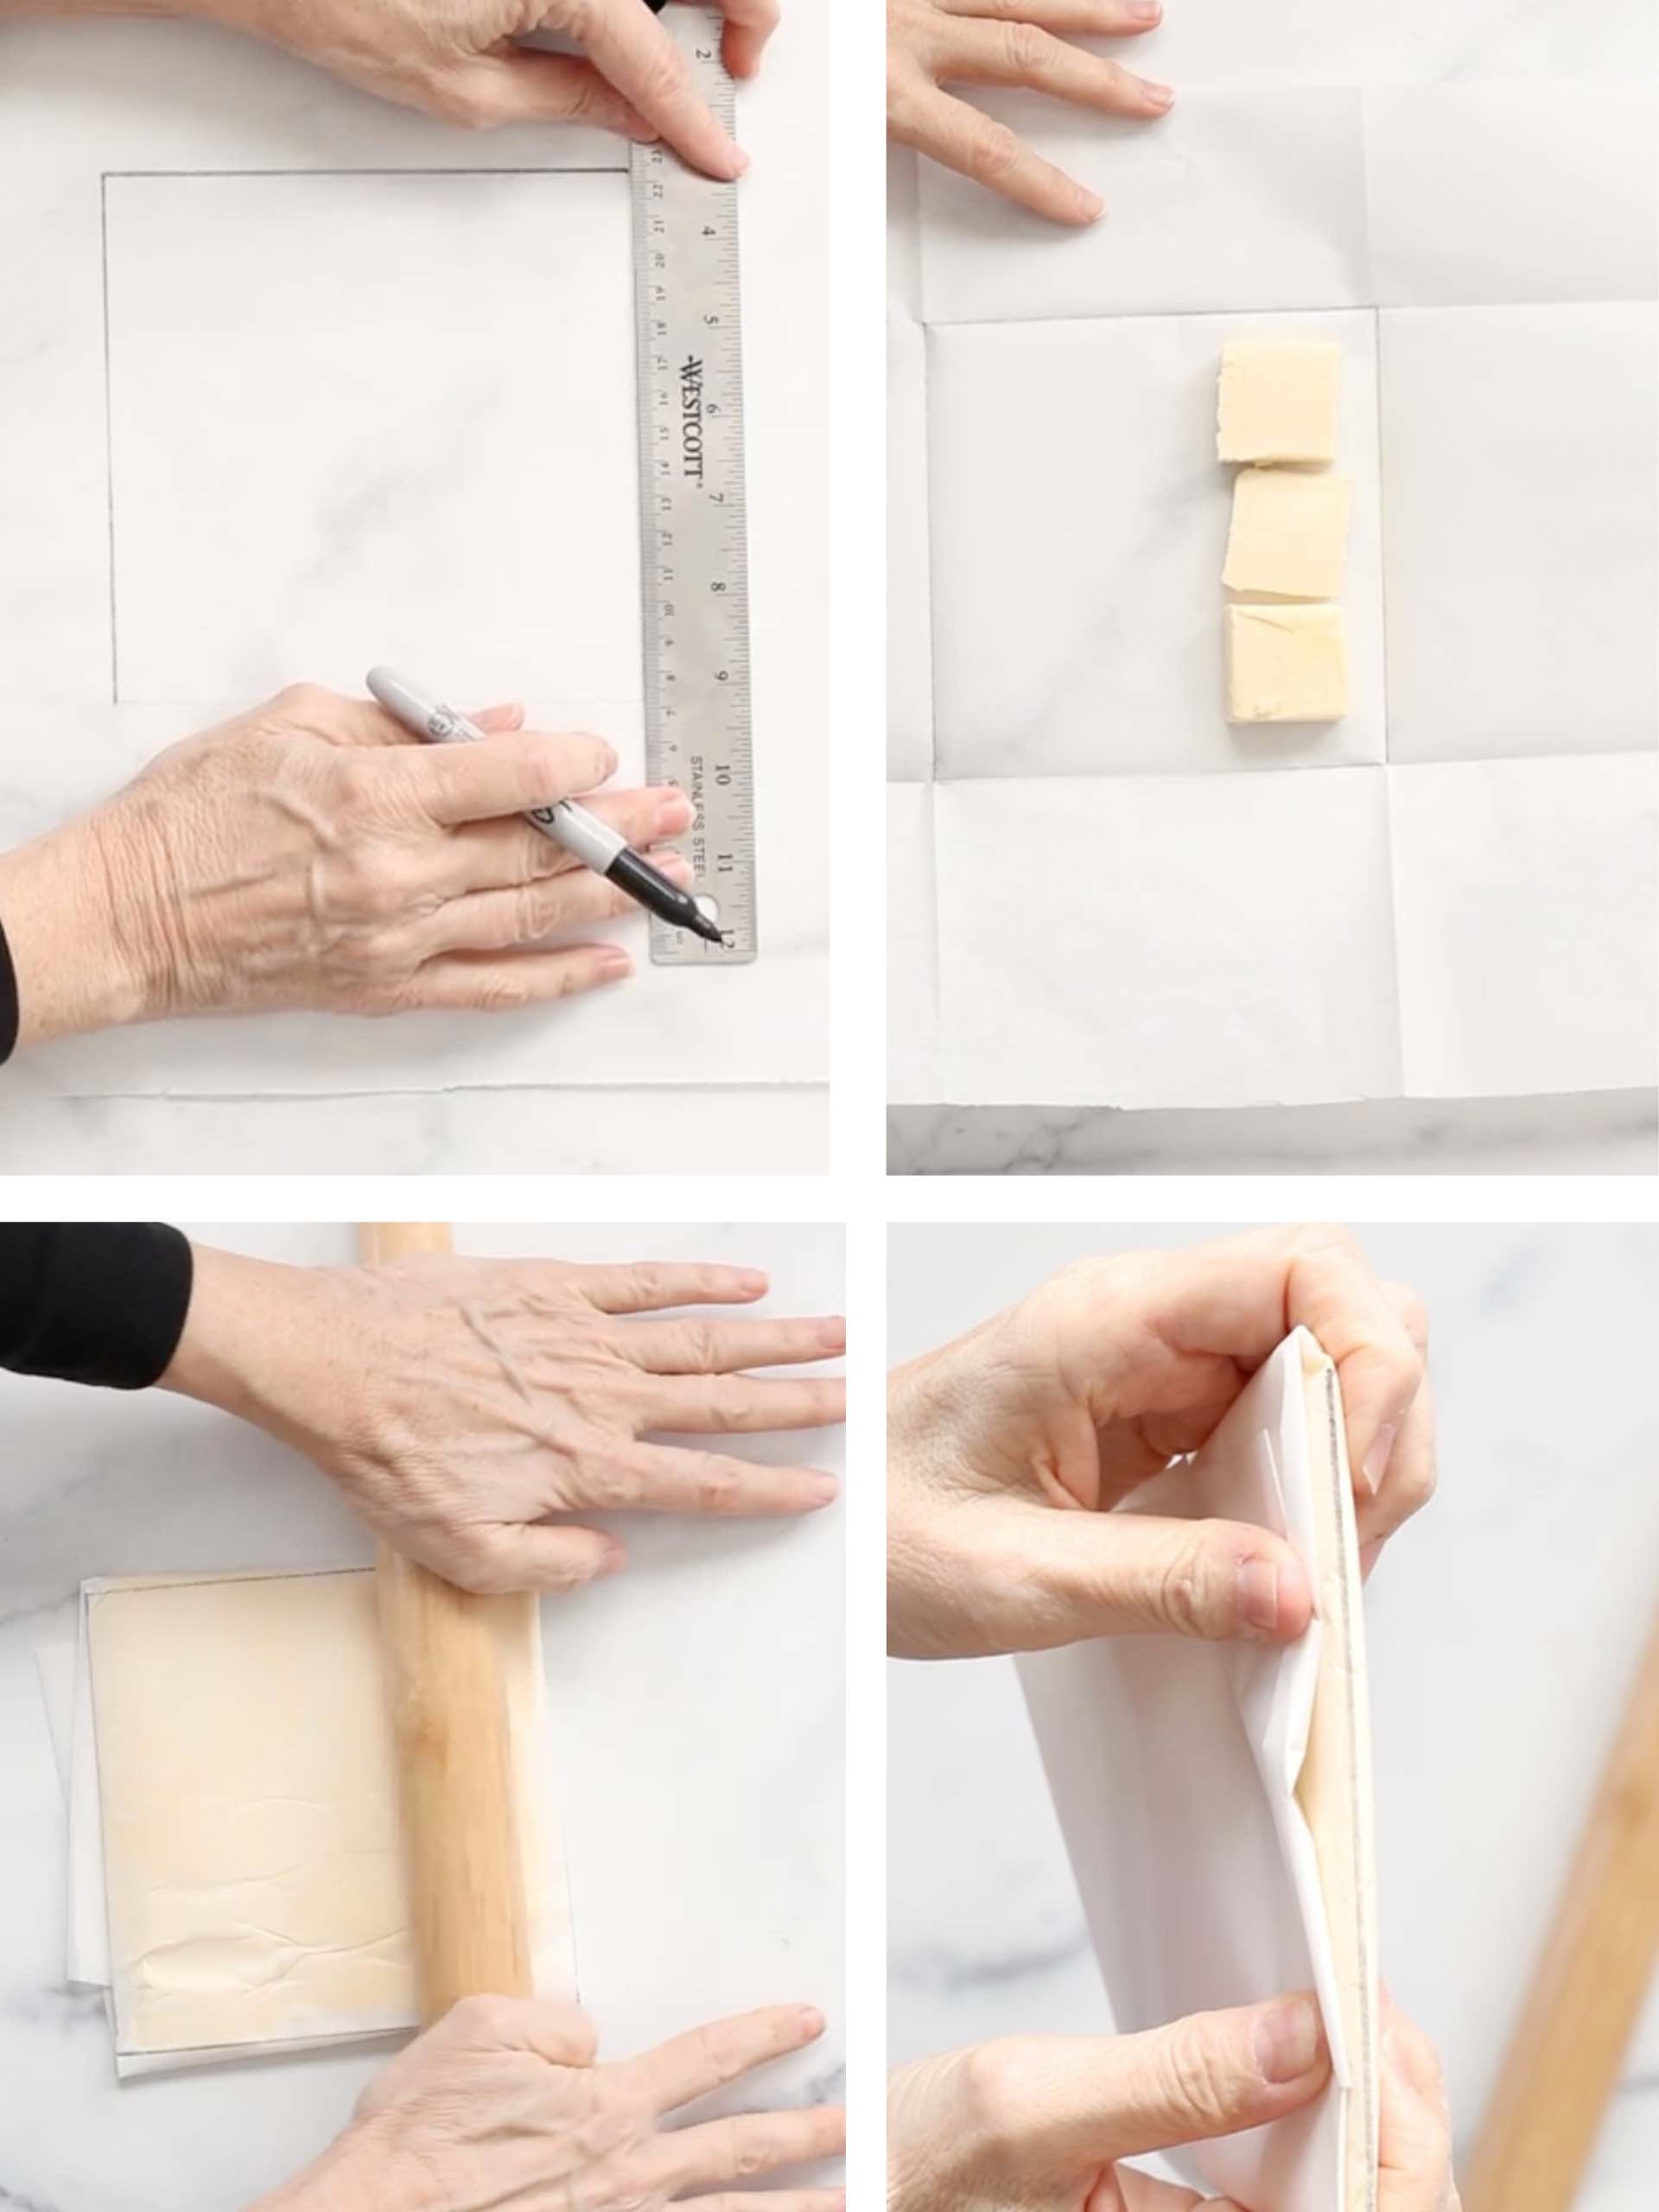
Measure your parchment paper 15cm x15cm (6″x6″). Cut the chilled butter / shortening into chunks and arrange them on parchment paper. Fold the sheet along the lines. With your rolling pin, press down and roll out your butter/shortening block. Don’t roll it past the edges! Put the butter / shortening block in the refrigerator until you’re ready to use it.
STEP 3 – ADD THE BUTTER/SHORTENING BLOCK TO THE DOUGH (This is called lamination)
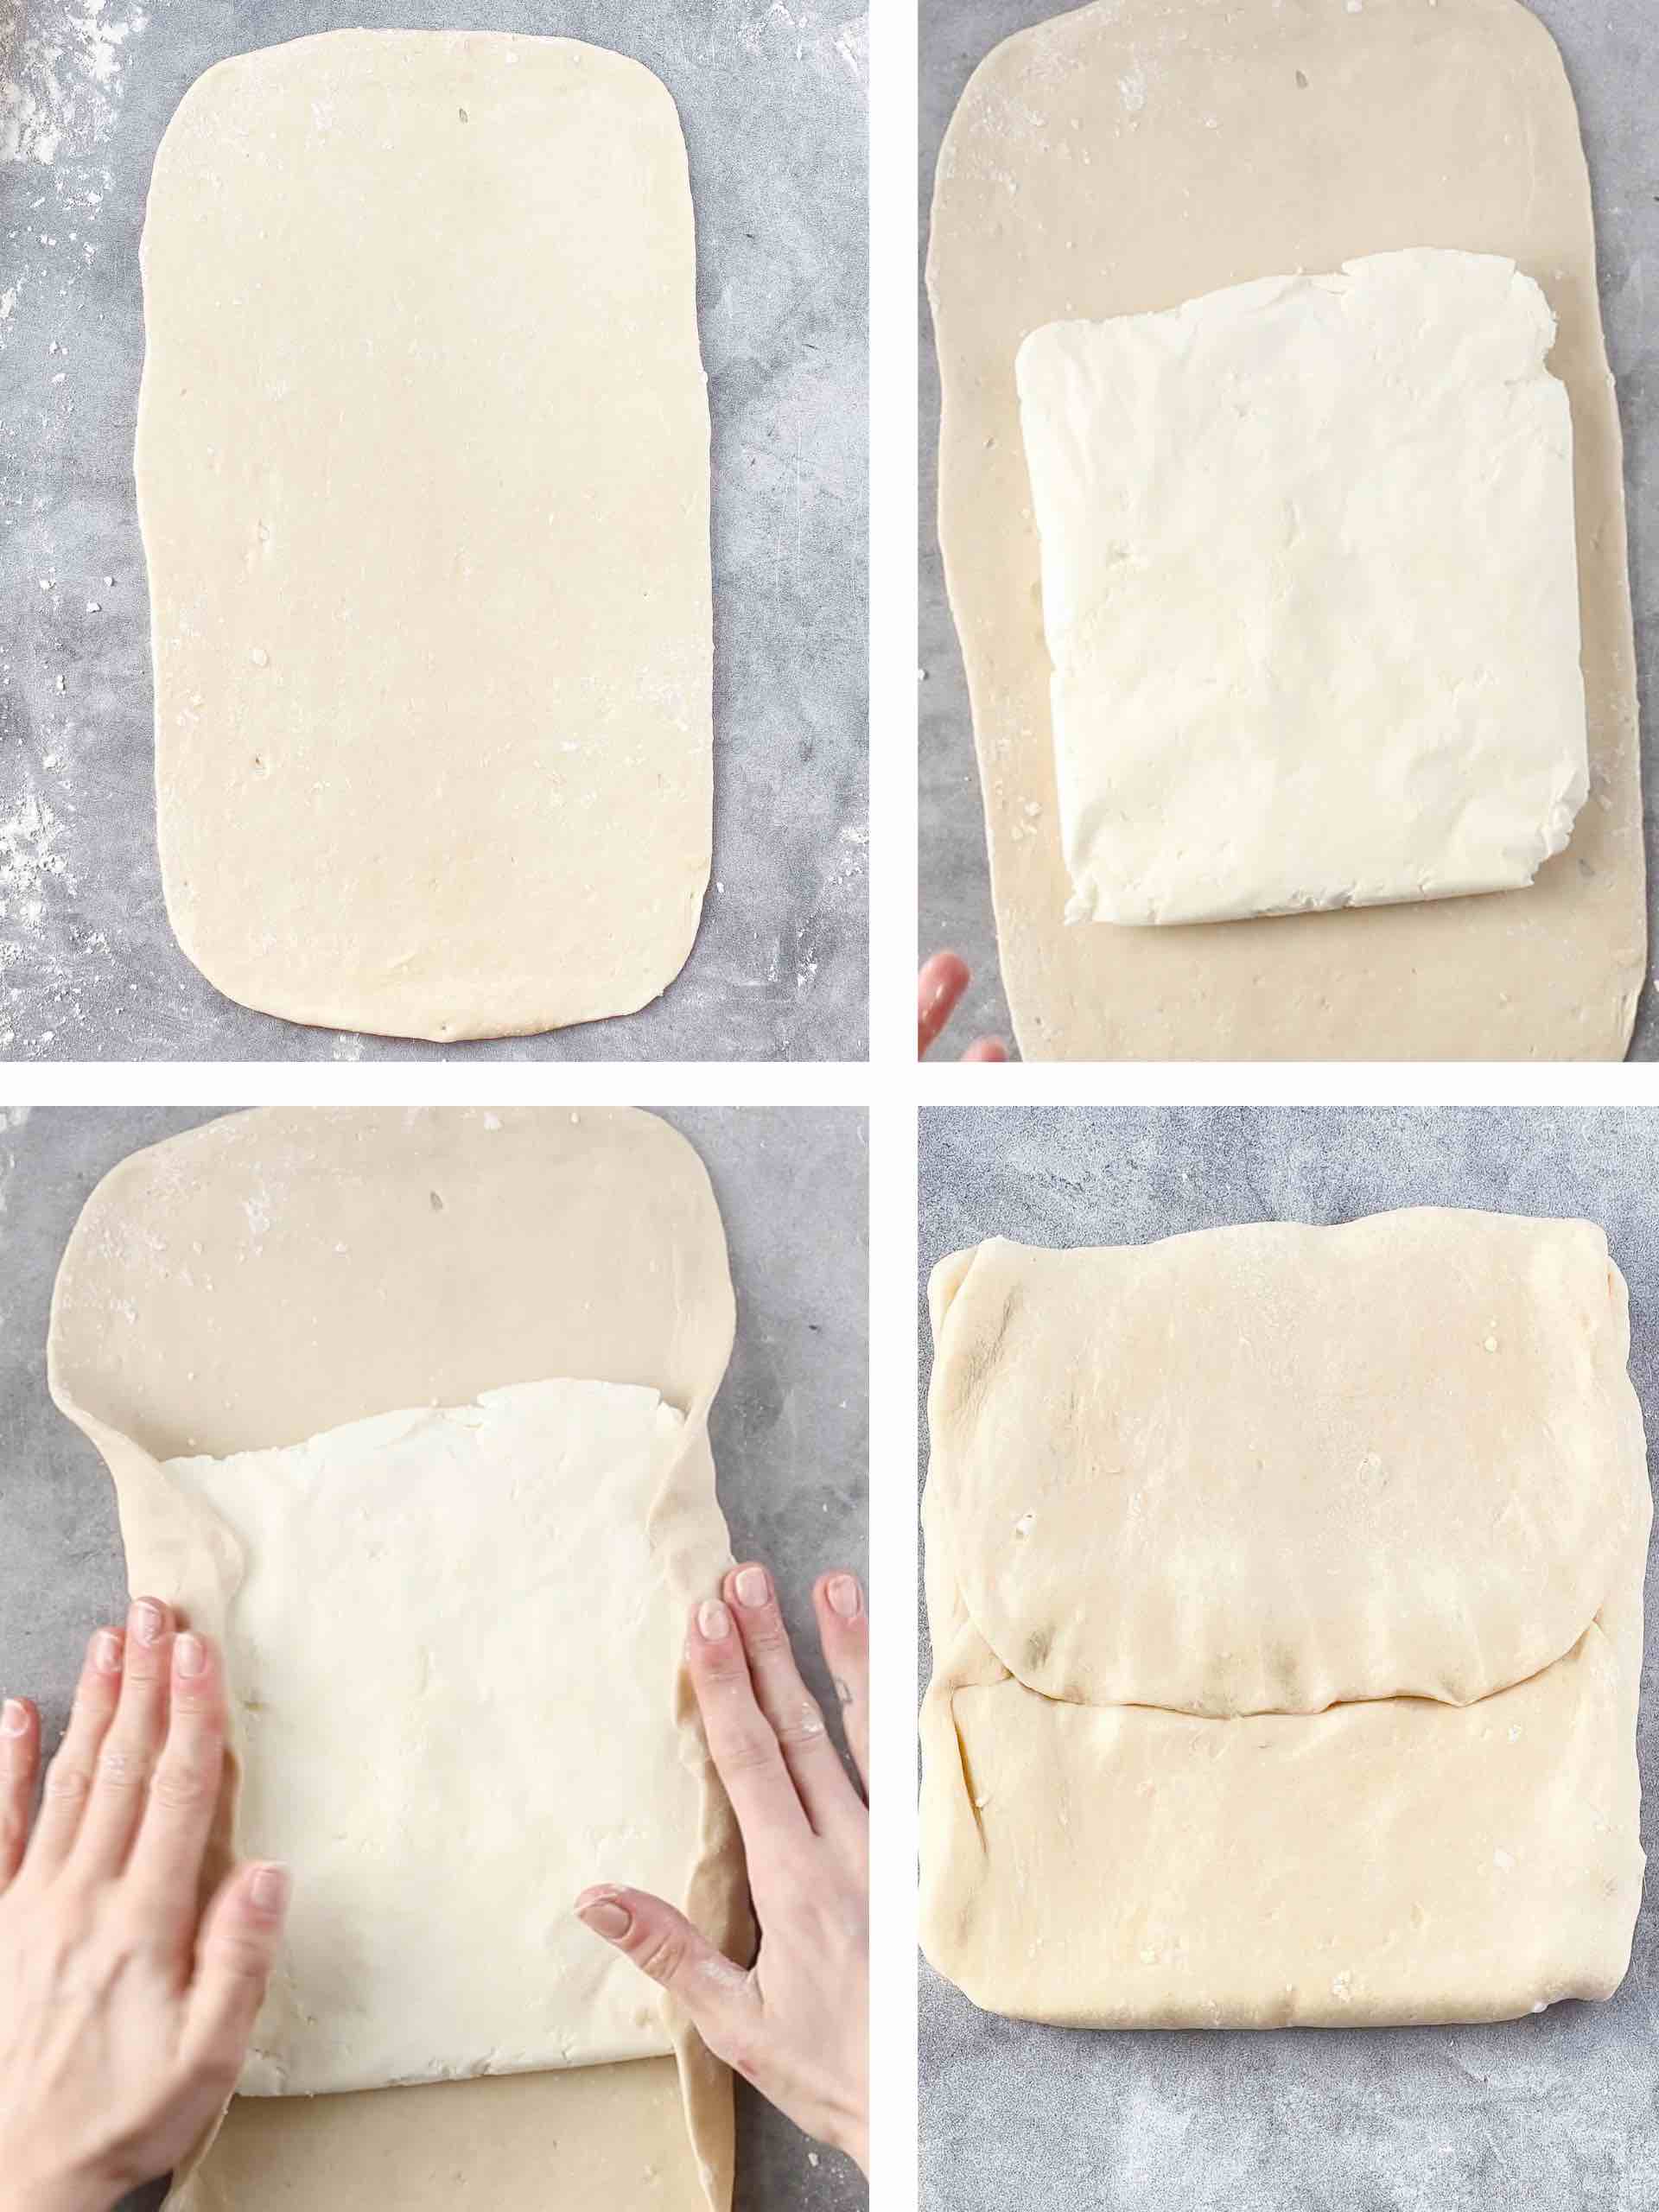
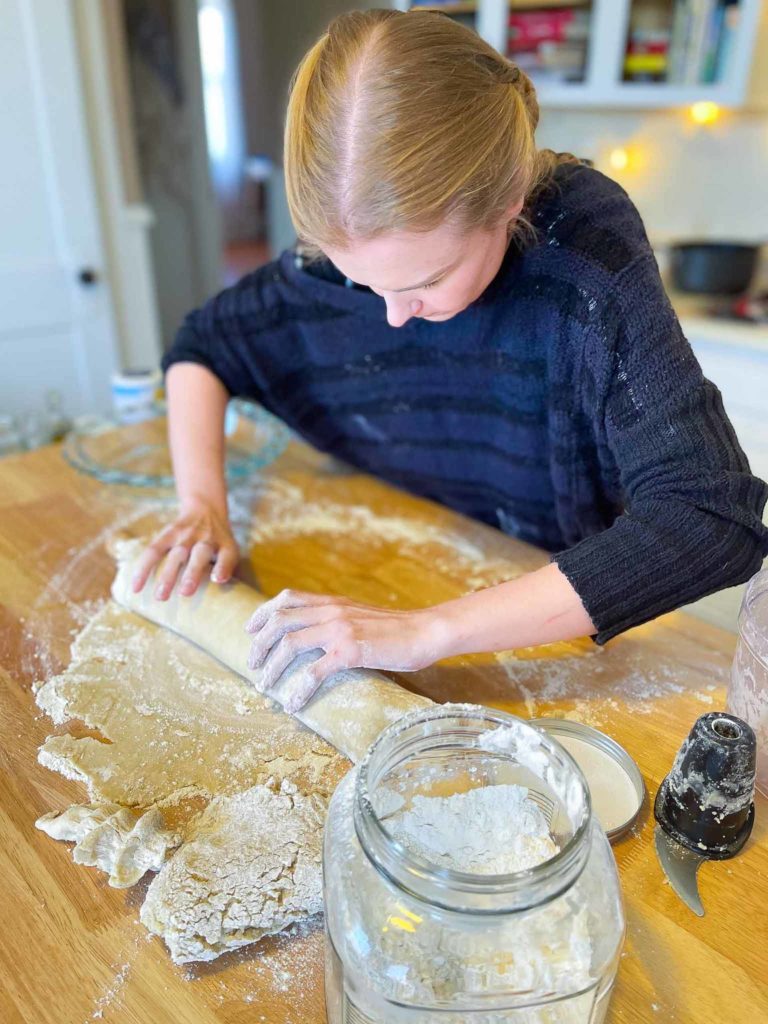
Remove the dough (détrempe) from the fridge. Roll it out, trying to create a rectangle twice the size of the butter. (In my case, the length of the butter is 15cm (6″), so I rolled out the détrempe to 30 cm (12″), which is twice as long plus a little extra, so there’s enough for the cover). While rolling, flip the détrempe occasionally.
When you get a rectangle that has the same width as the butter/shortening but twice as long, the détrempe is ready. Remove the butter/shortening block from the fridge. Place the butter/shortening at the center of the détrempe.
Wrap the détrempe around the butter/shortening and close the edges well. The dough is now ready for rolling and folding.
STEP FOUR – ROLLING, FOLDING, AND TURNING (lamination)
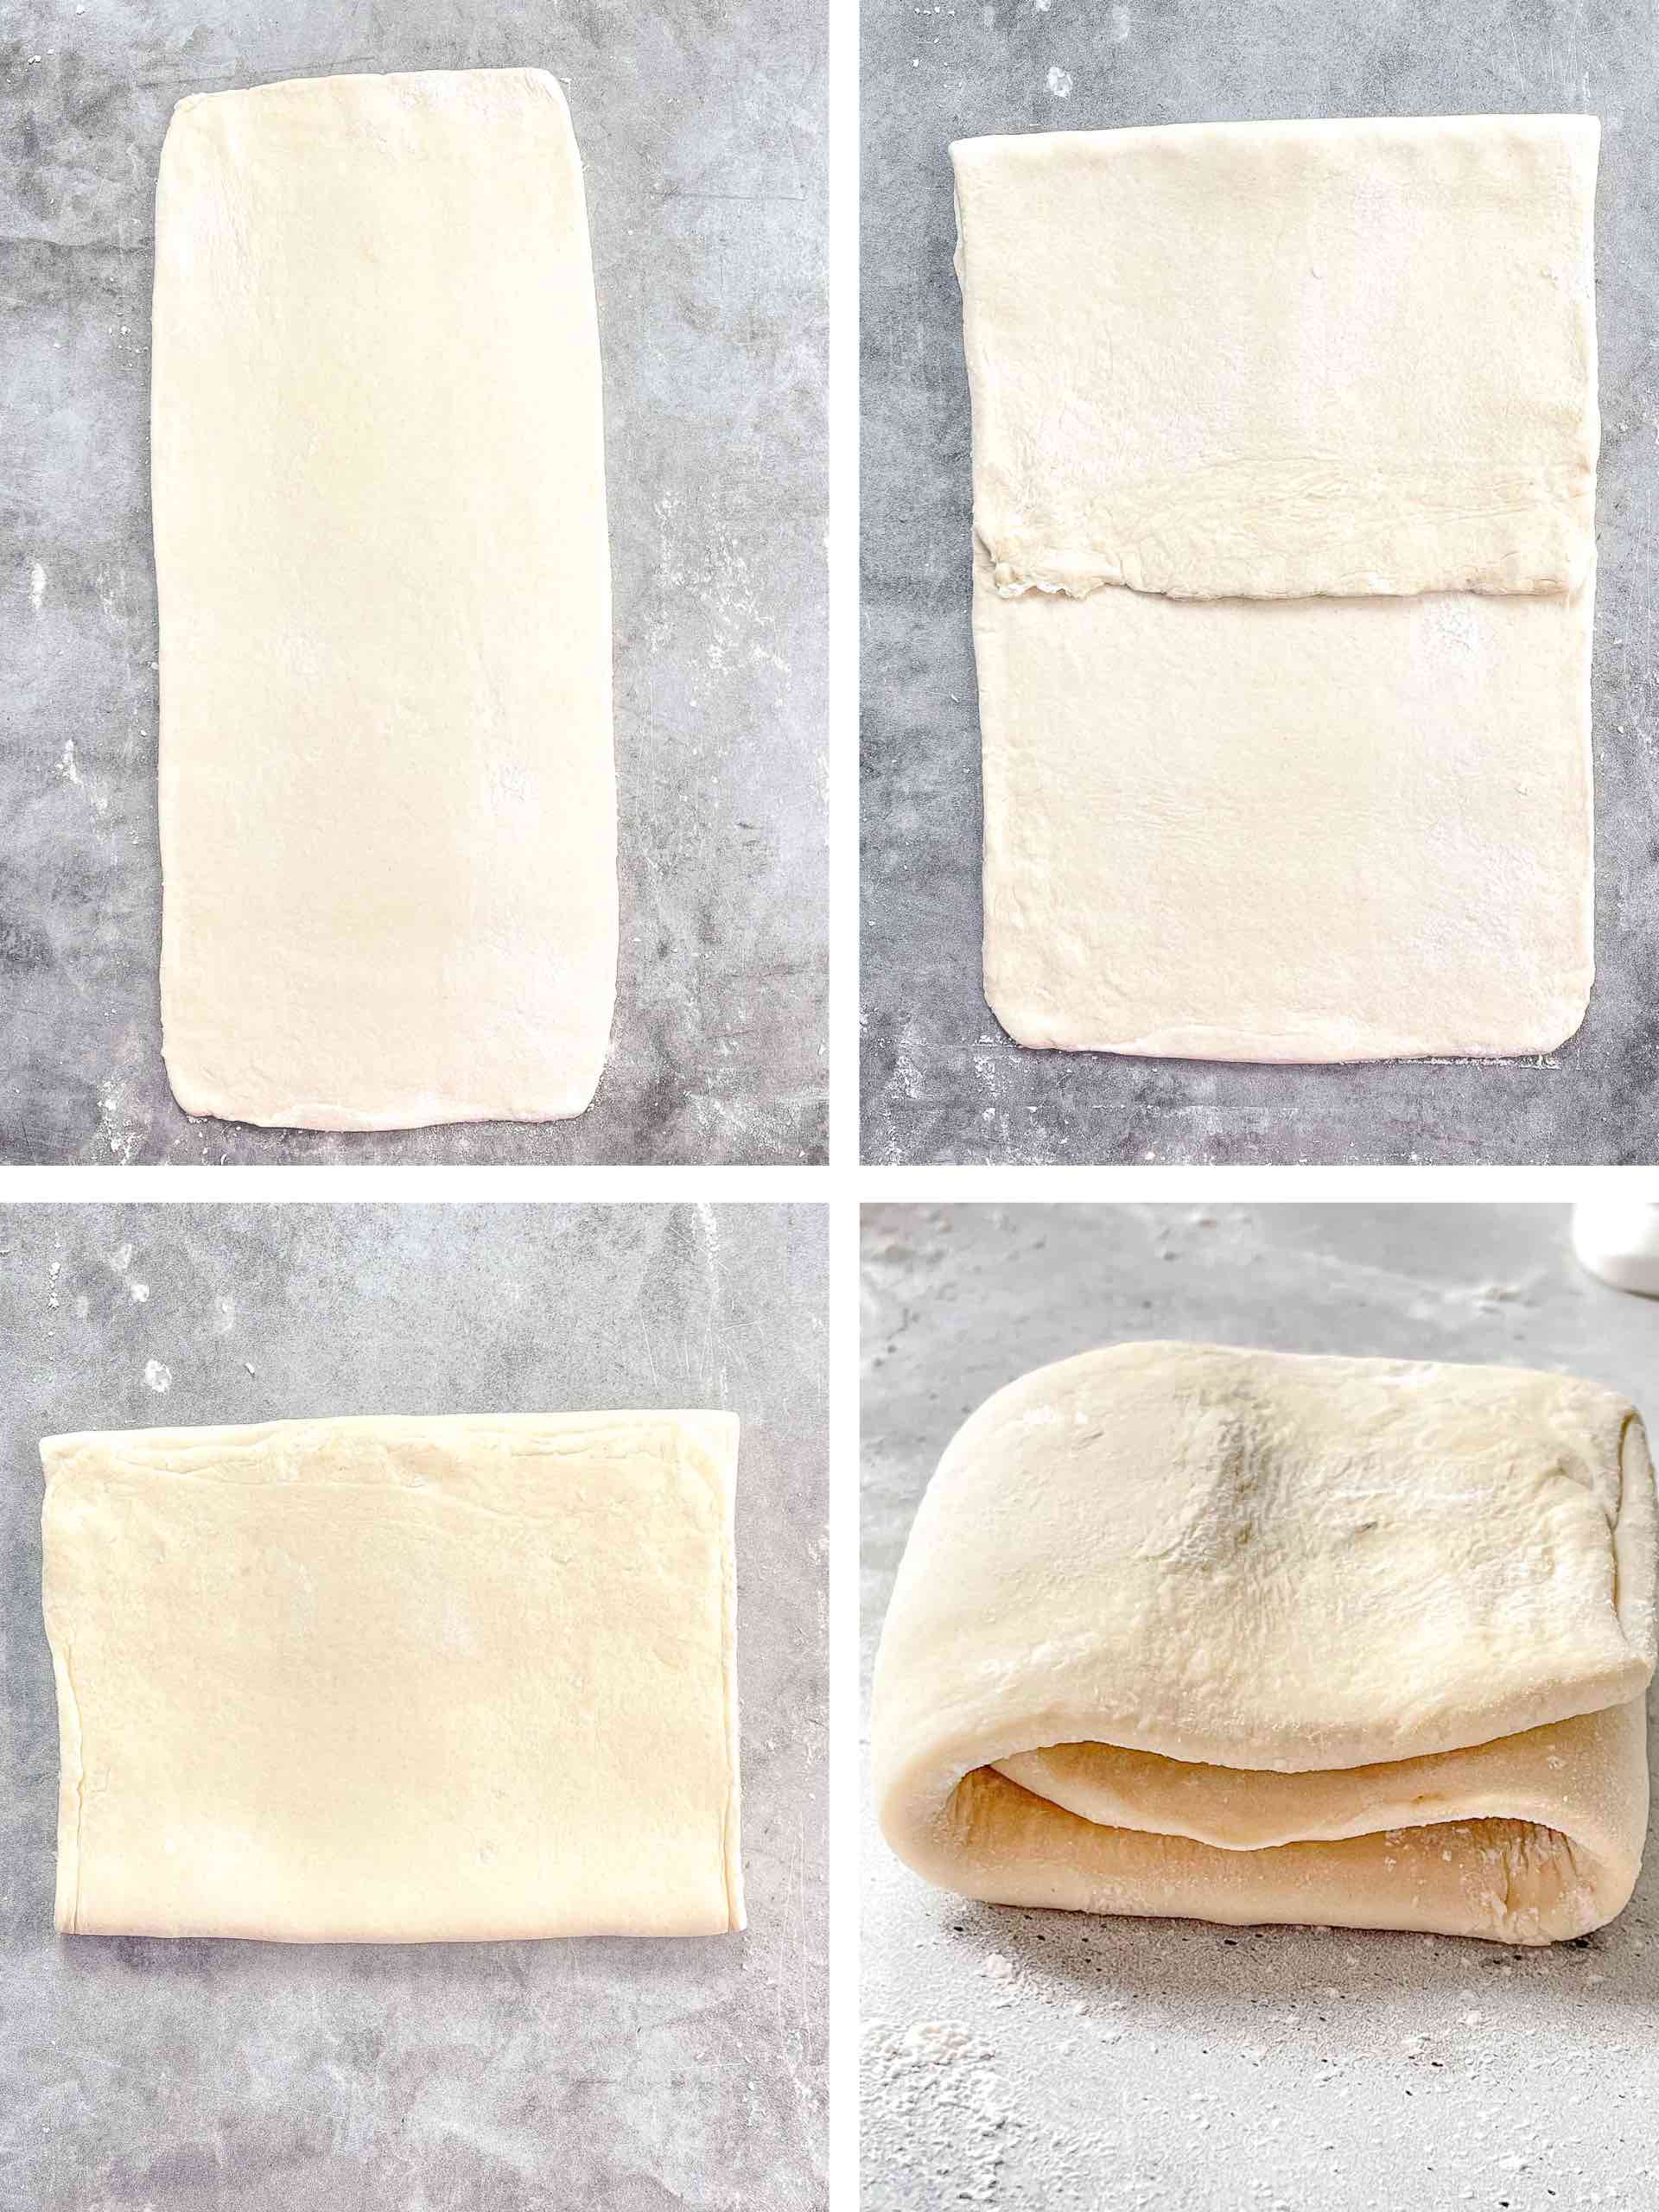
First Turn (7 layers – Wallet Fold) – The next day (or whenever you’re ready), remove the rough dough with the butter block and place it on your workspace. Roll it out to 50cm x 20cm (20″ x 8″) to 1.5cm (1/3″) thickness. Roll the dough up, down, up, down, and then flip it. Flour the surface lightly, but only if it’s needed. Fold one side on 2/3 of the dough and then fold the rest. This gives you a folded dough with three layers, commonly a ‘wallet fold.’ Straighten the margins. Turn 90°. Cover in plastic wrap. Keep in the fridge for half an hour or even longer during summertime.
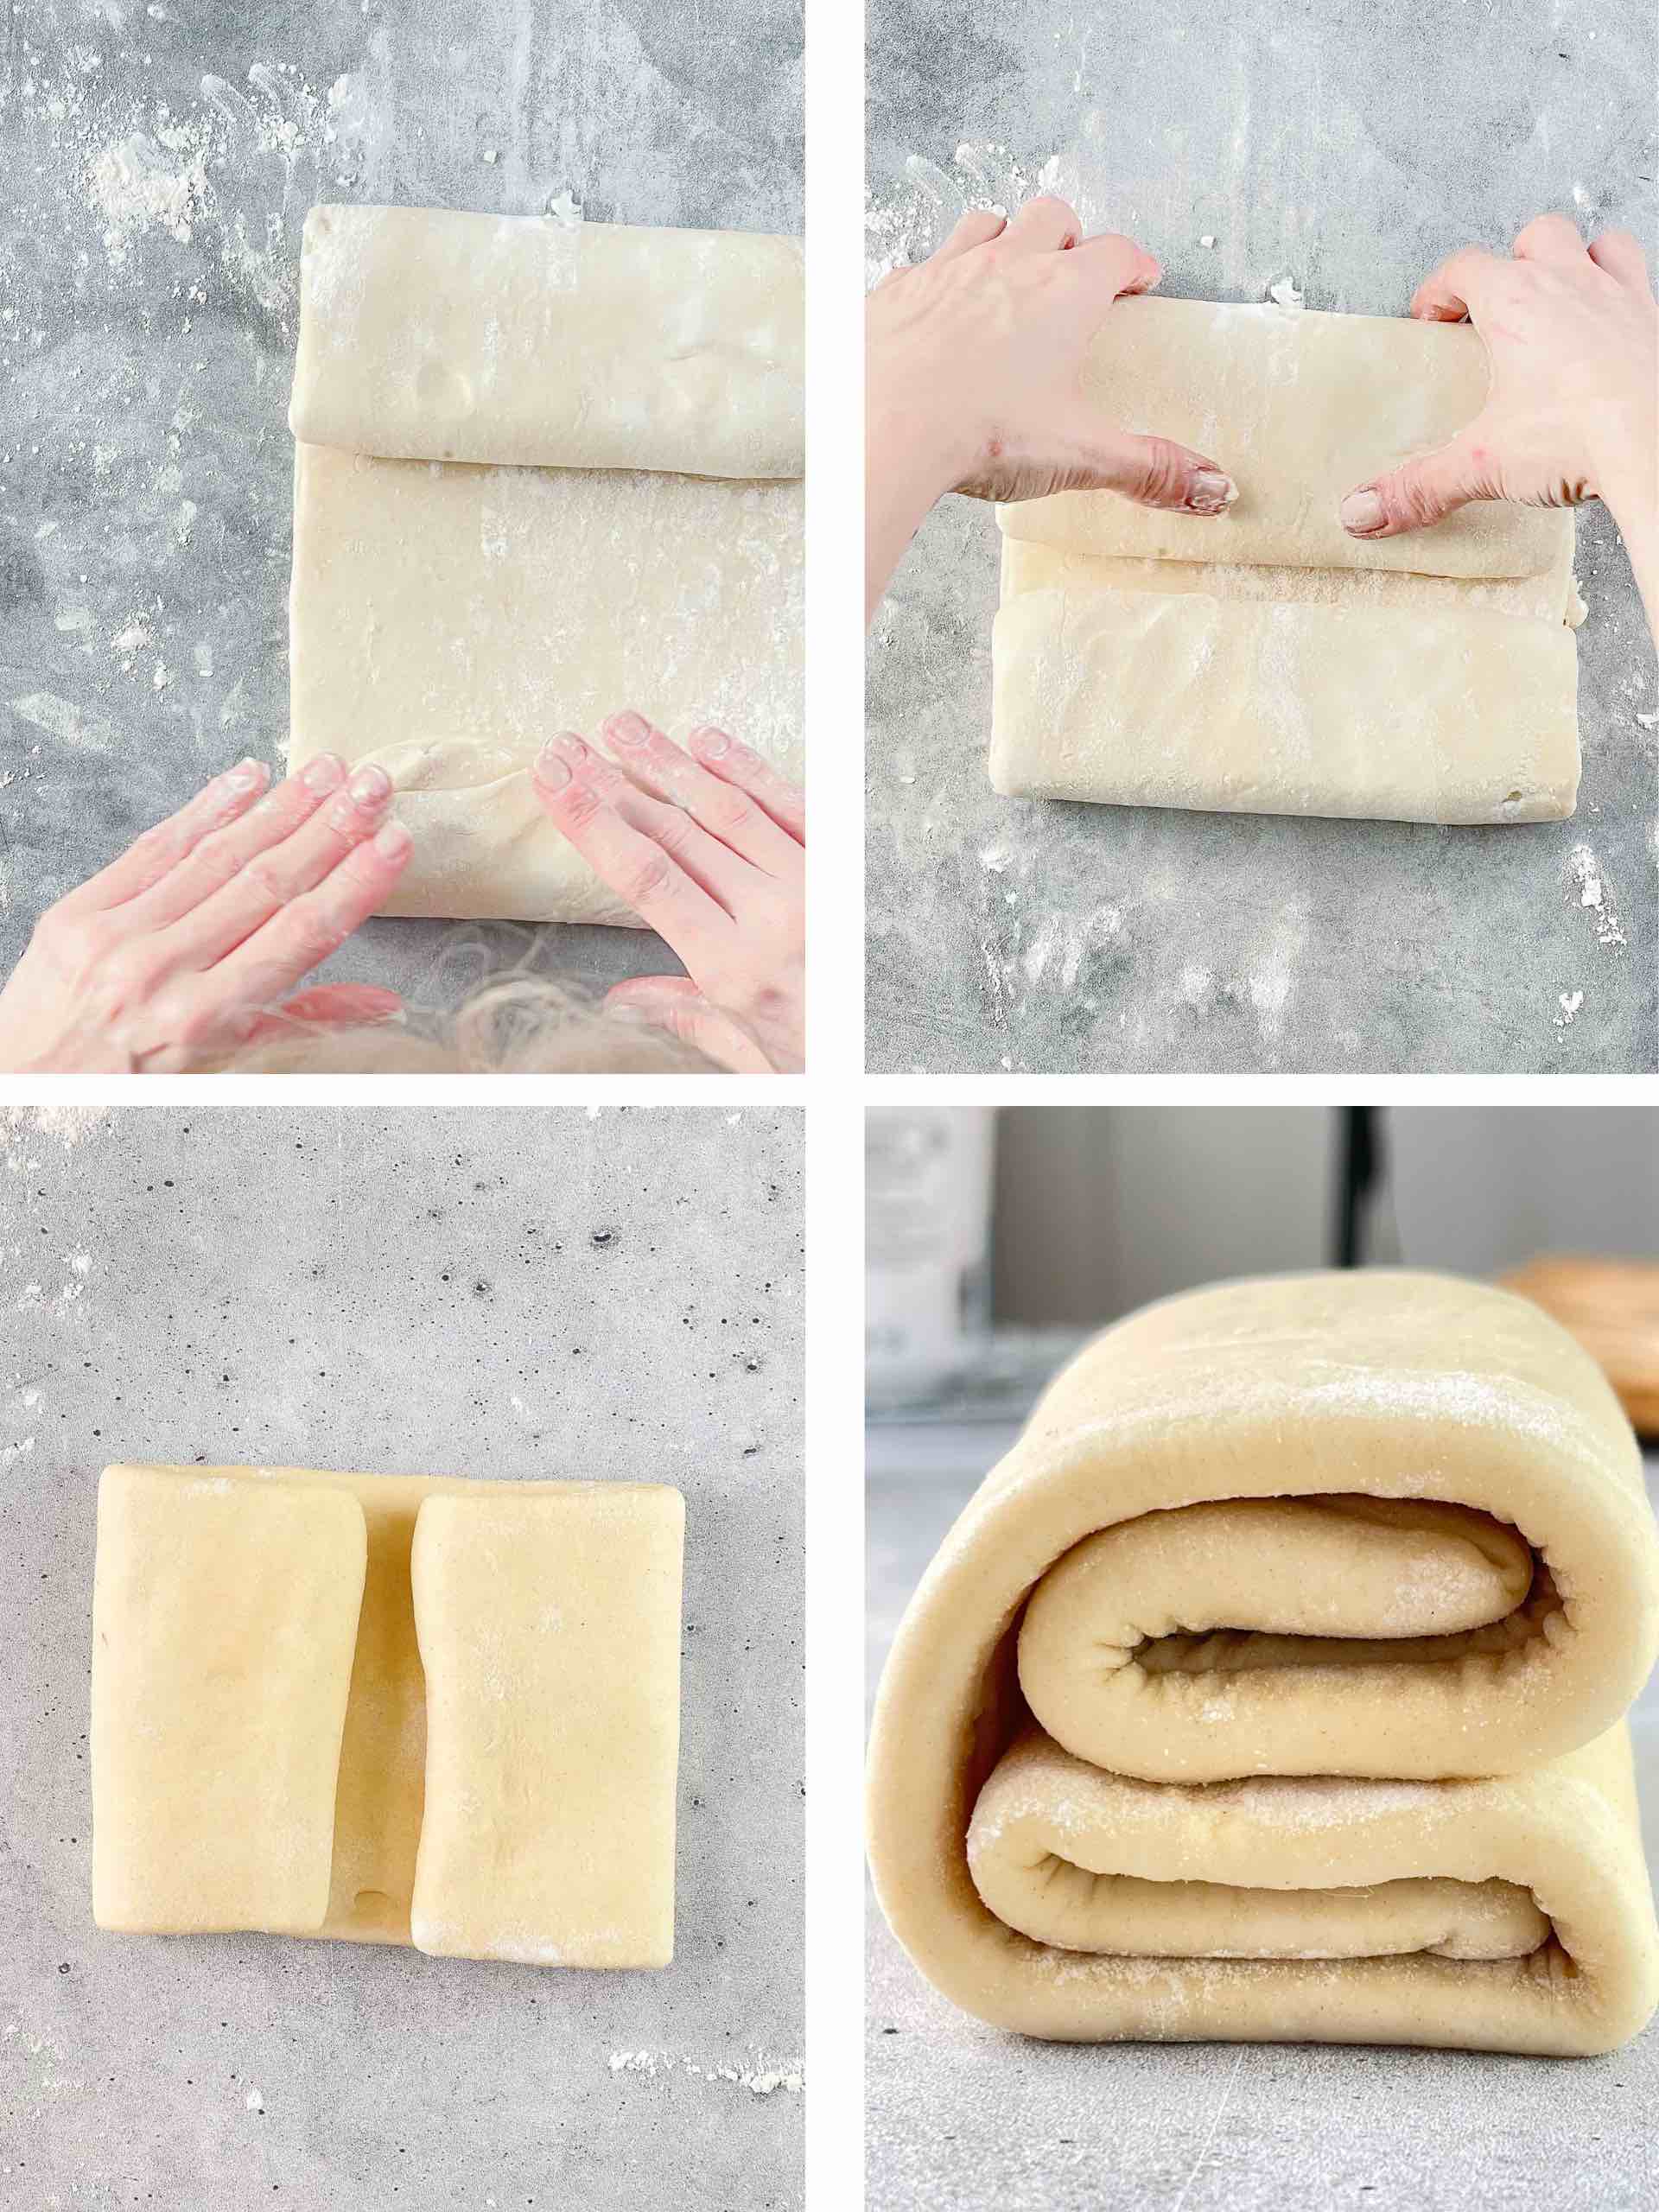
Second Turn (97 layers – Double Book Fold) – Time to roll, fold, and flip for the second turn. Roll the dough to 50cm x 20cm again (20″x 8″). Fold one side on 1/4 of the dough and then fold the other side the same. Fold both sides over to form a ‘book fold.’ Turn 90° and refrigerate for 30 minutes.

Third Turn (289 layers – Wallet Fold) – Remove the dough from the refrigerator. Roll the dough out to 50cm x 20cm (20″x8″) and do another ‘wallet fold’ this time. Turn 90° and refrigerate for 30 minutes.
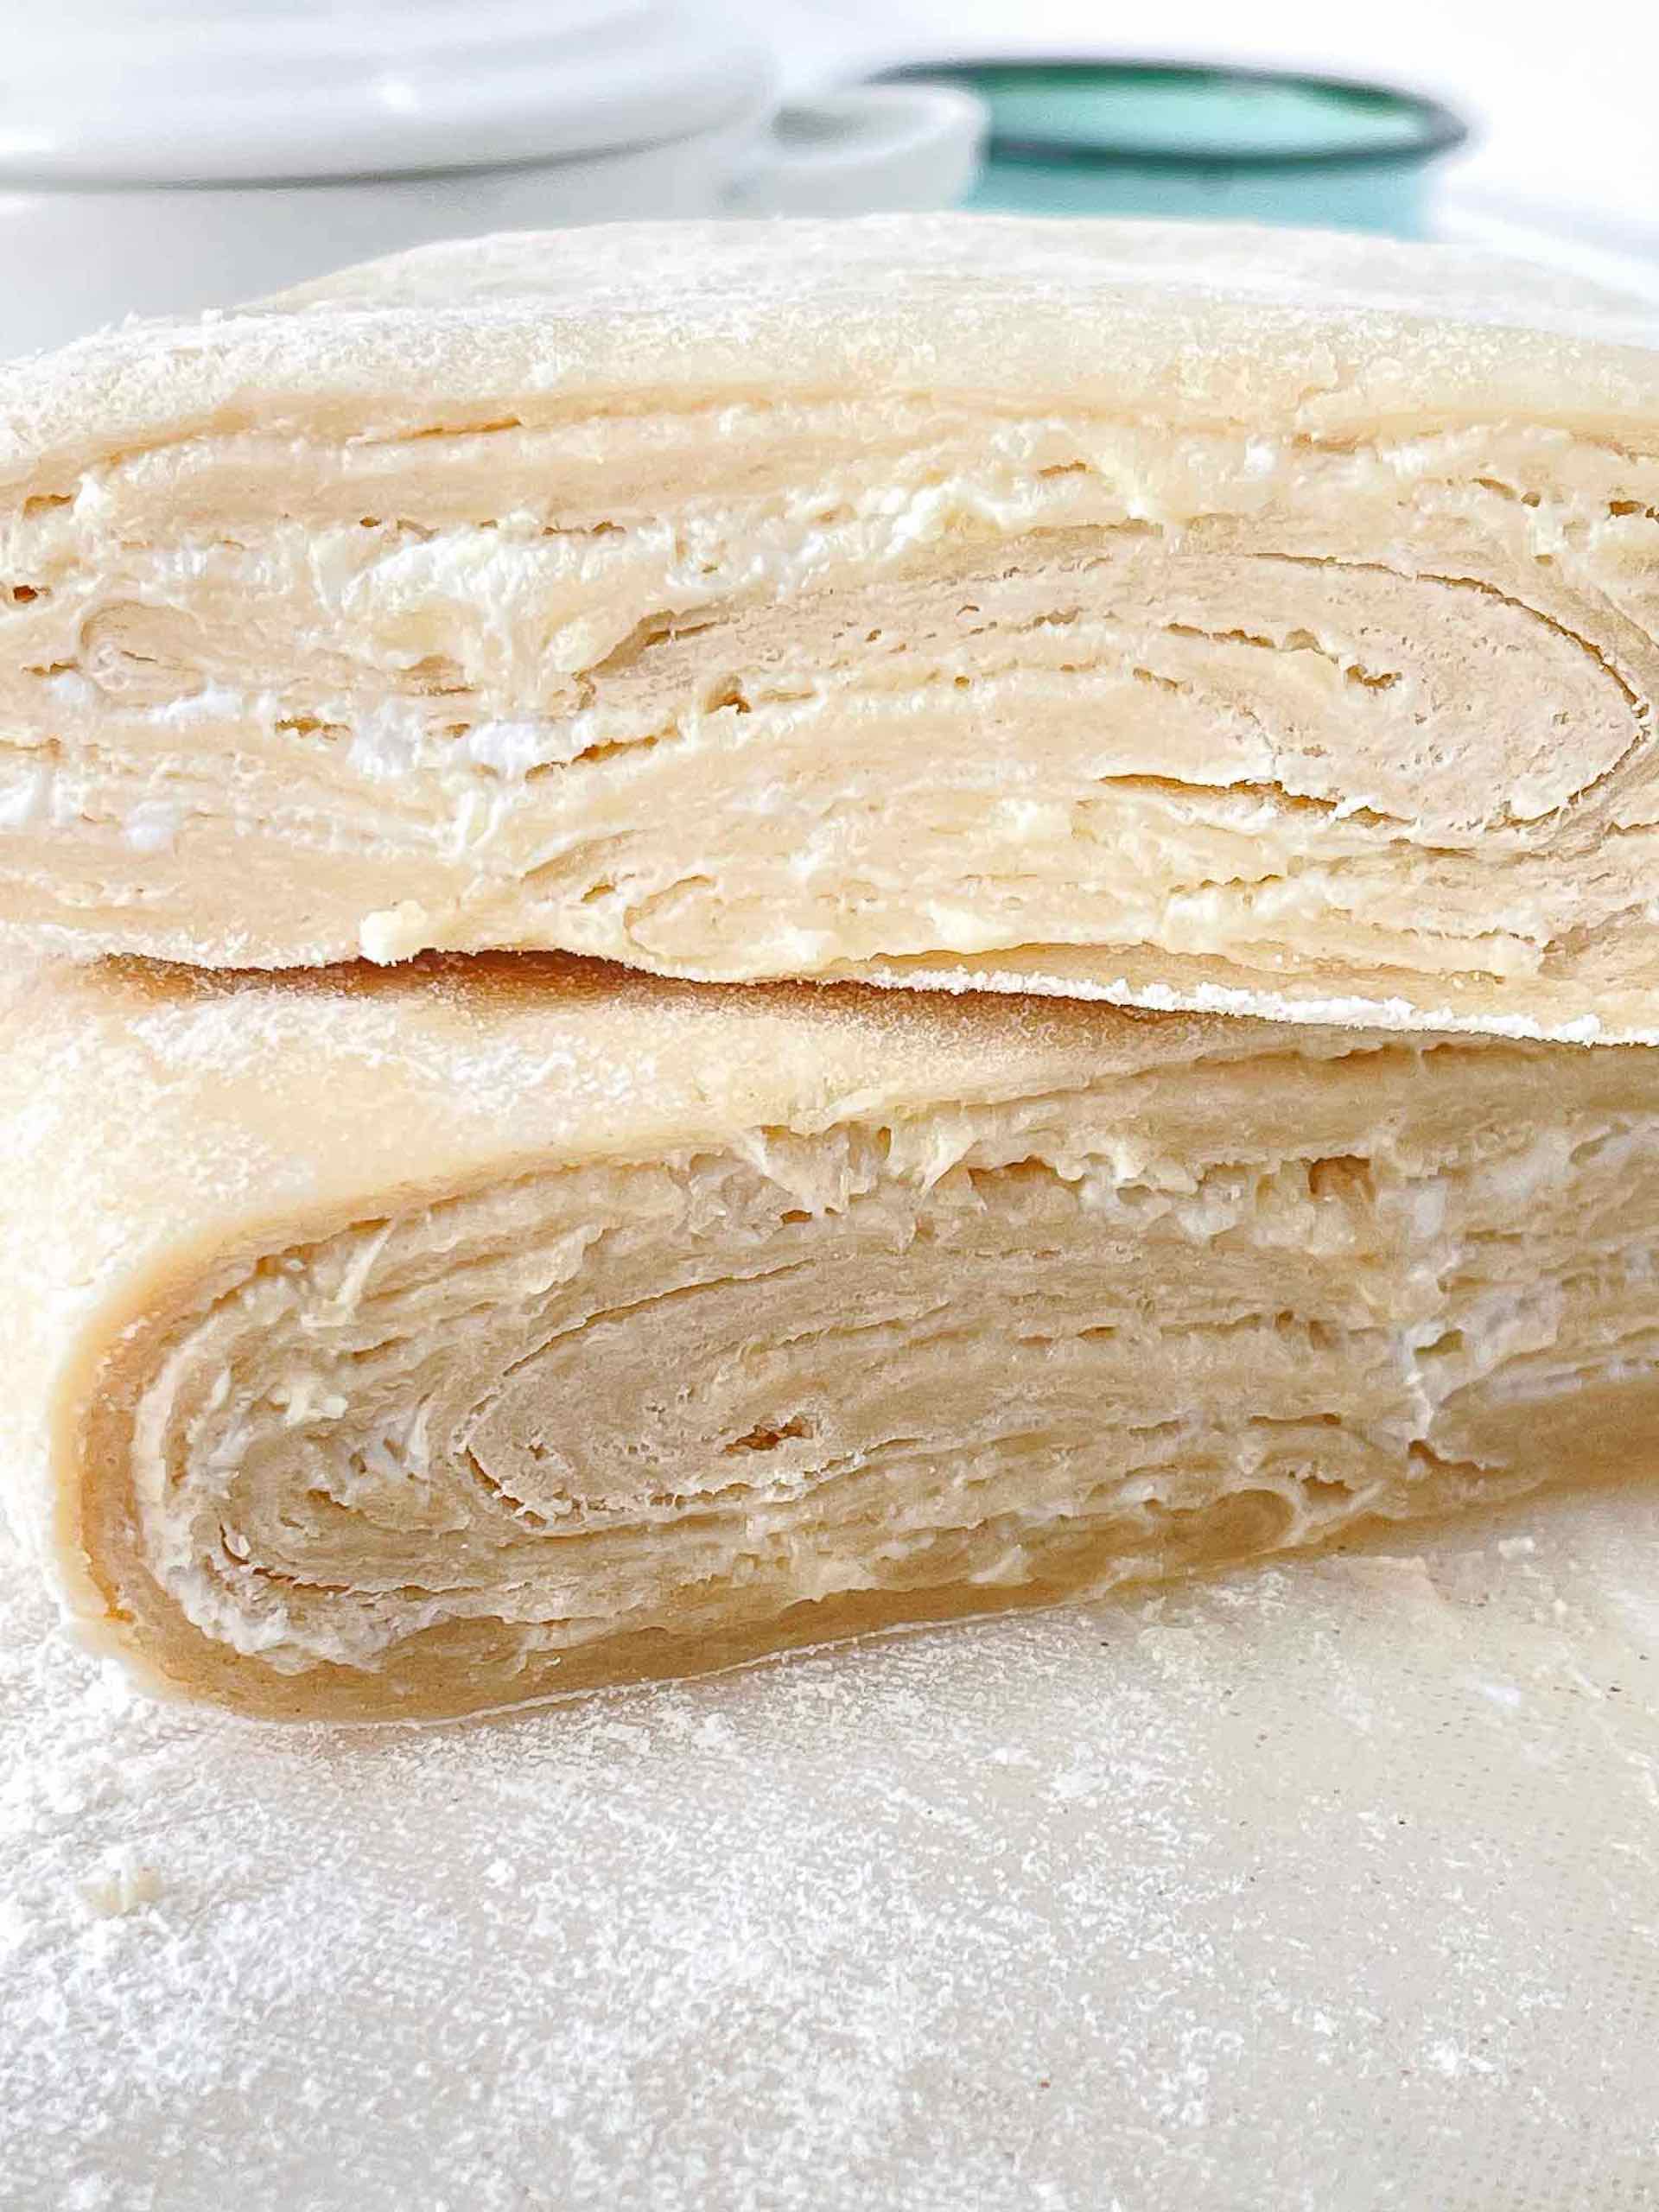
Voilà! Your dough is ready to use. As you can see in the photo above, you’ll be able to see the layers of butter/shortening easily. You can ‘turn’ your puff pastry dough as often as you want. We usually “turn’ it 3 times with a double book fold as the 2nd turn. Once your puff pastry dough is fully turned and chilled you can start making whatever pastry you want: sweet or savory.
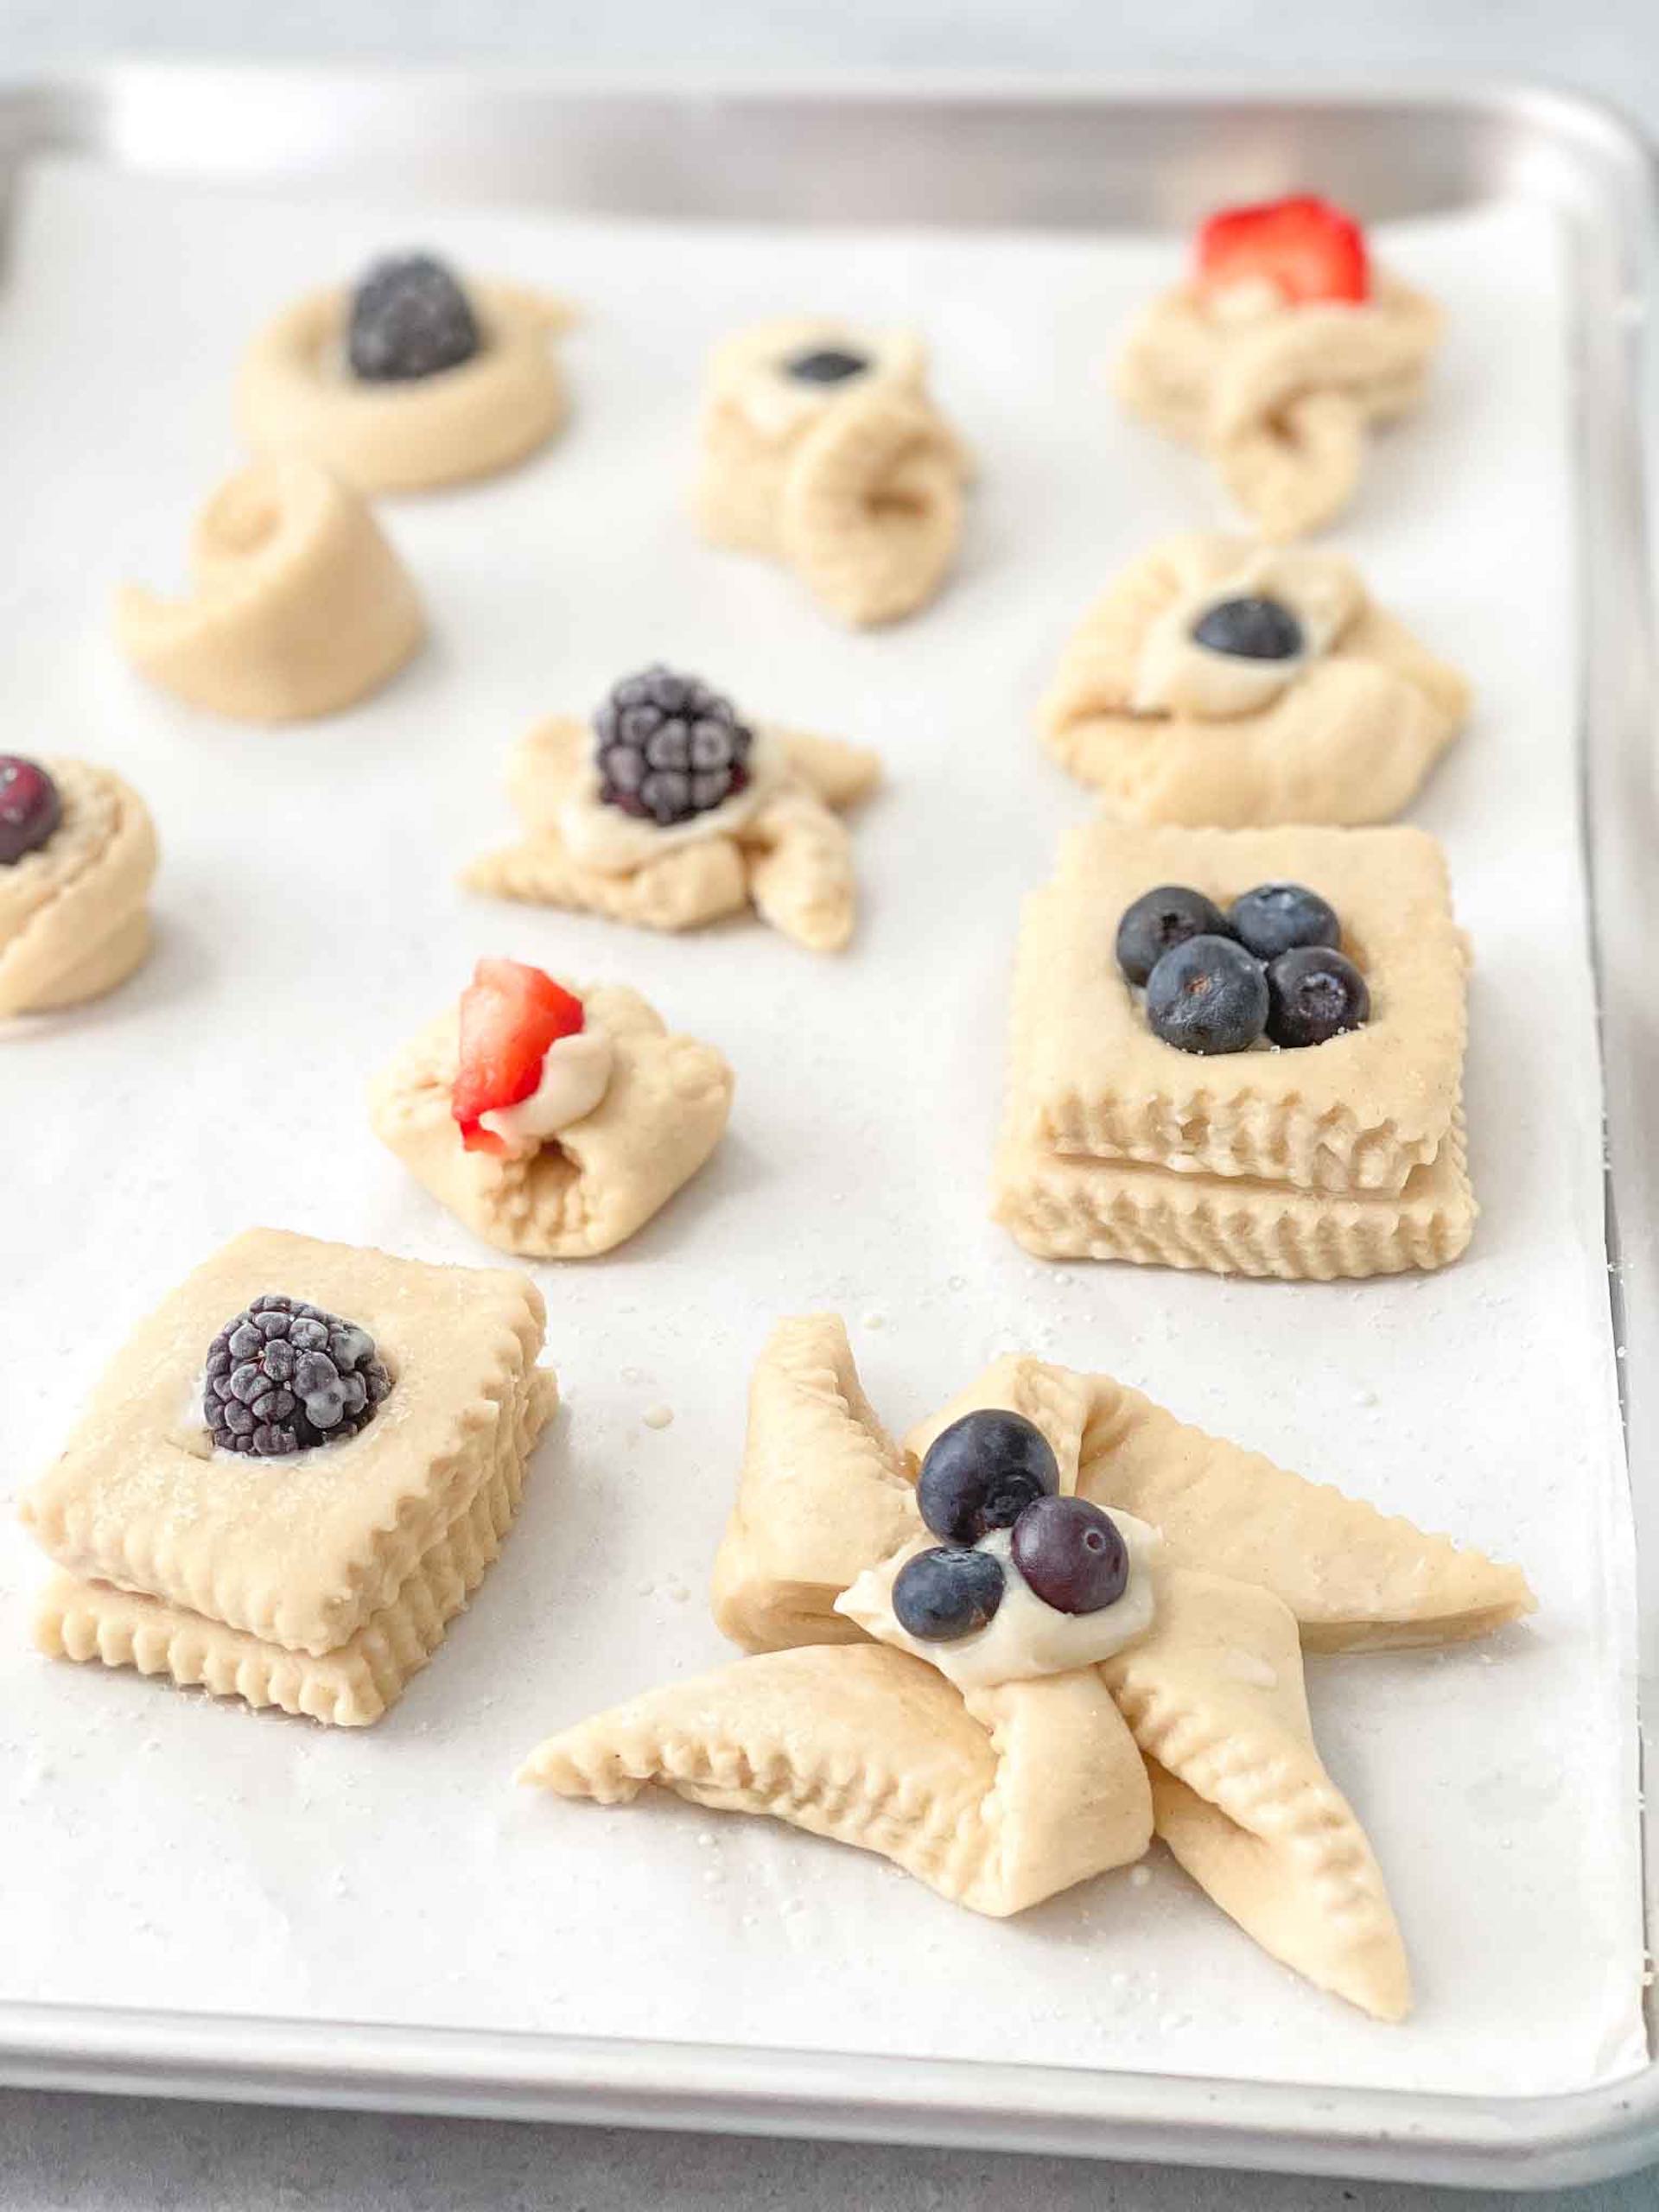
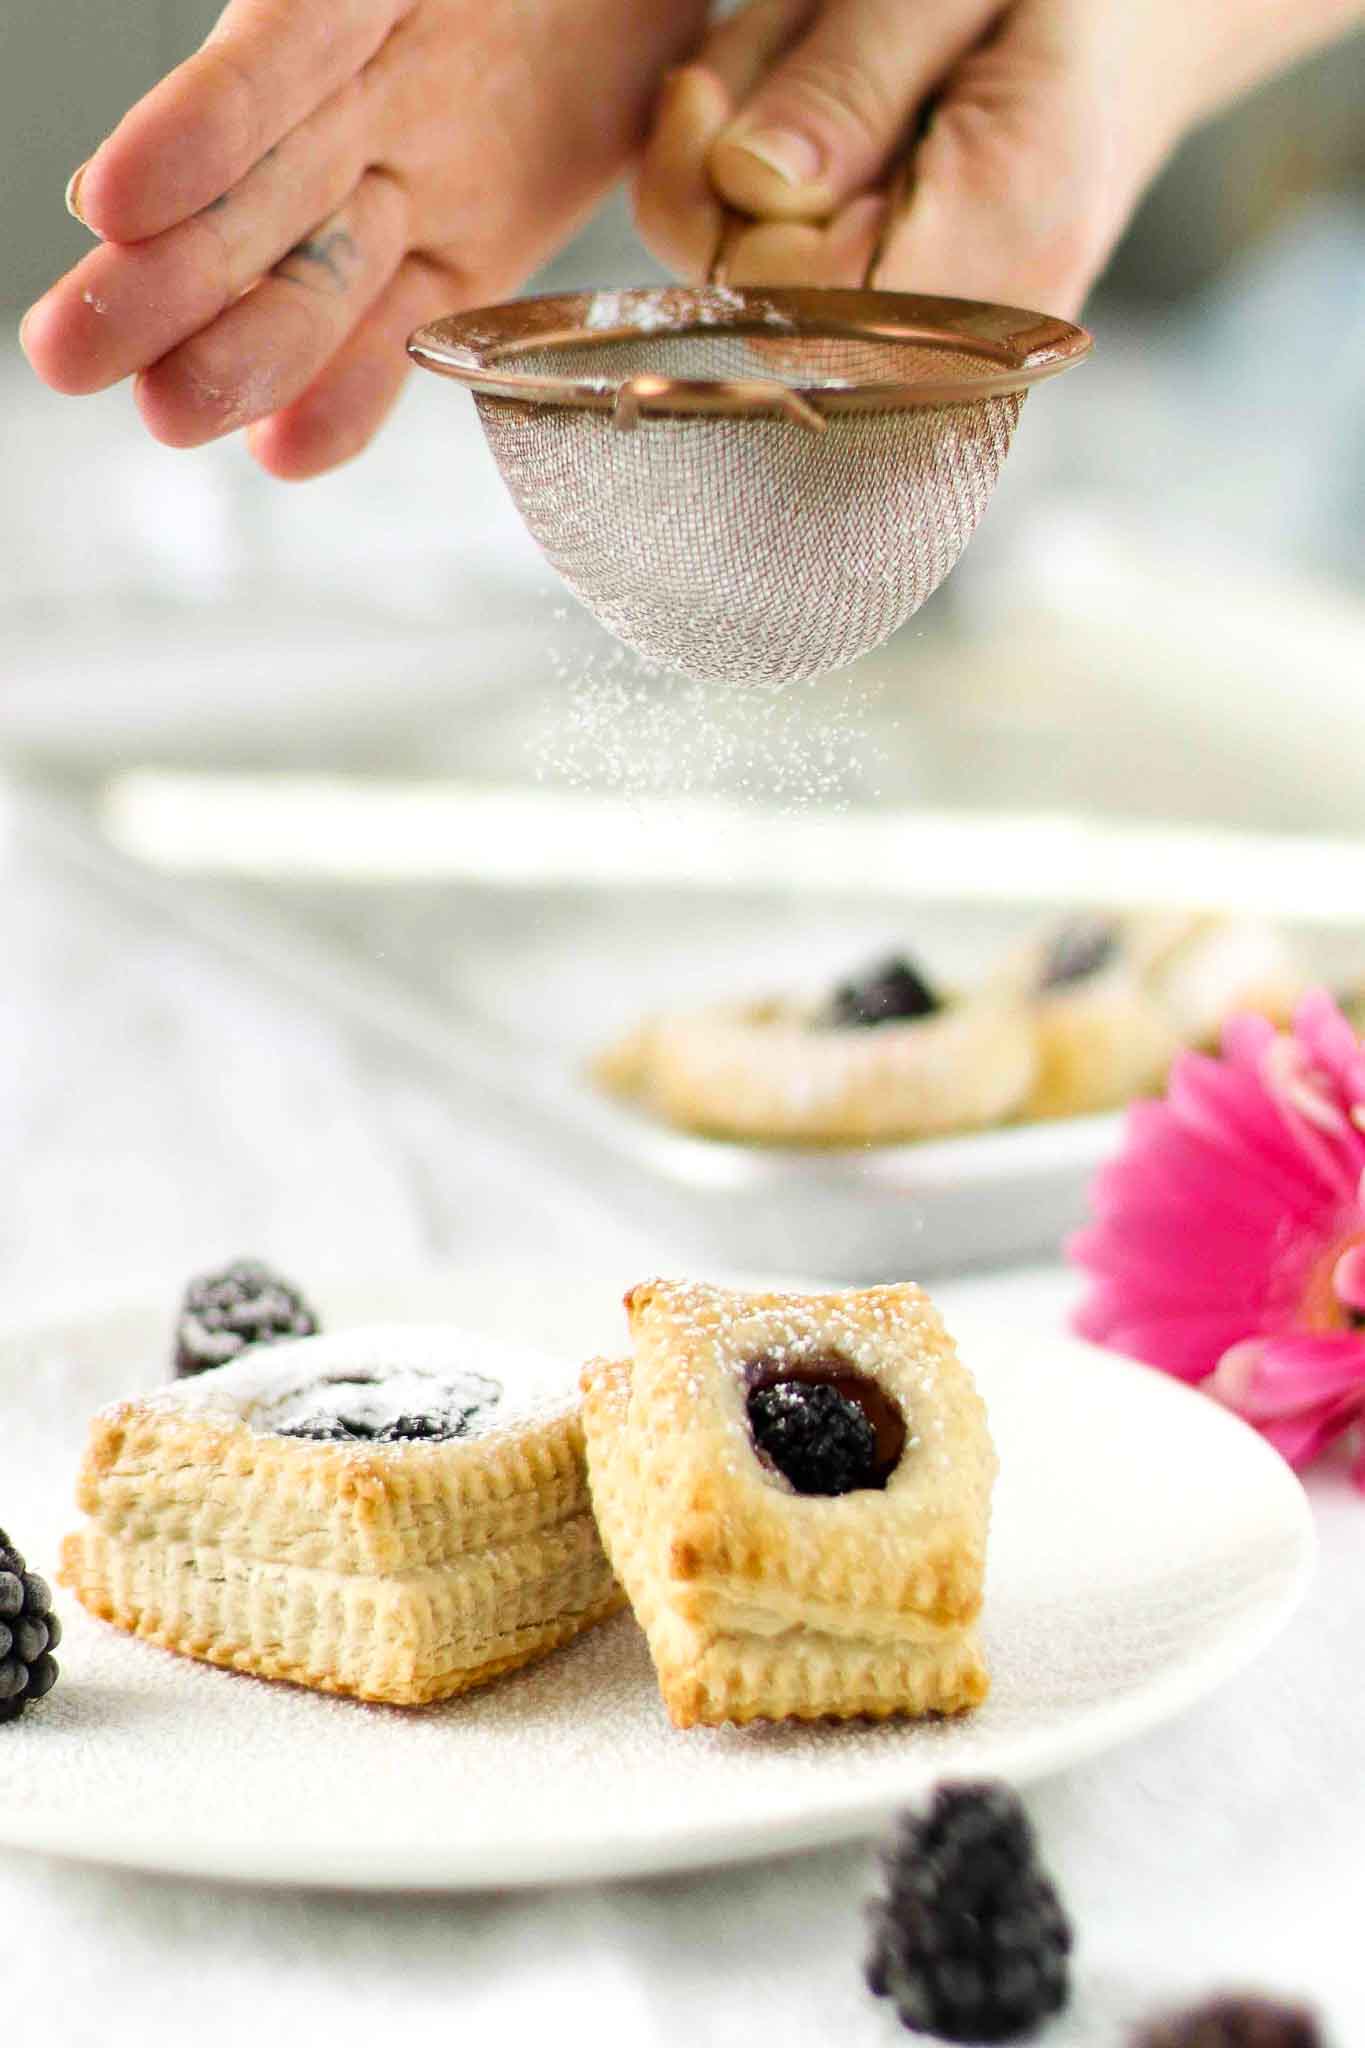
Then, pop your puff pastry in the oven at 425° for 20 minutes or until lightly browned. Then at 350° for another 20 minutes so your vegan puff pastry will cook all the through. You should easily be able to see the separate layers. Now you have a puff pastry!
How to Serve Your Vegan Puff Pastry
So many options! But here are a few.
-
- Vegan Pot Pie – Vegan Puff Pastry is a natural pot pie. You don’t have to cook the puff pastry ahead. Instead, rest it on top of your pot pie and watch it rise.
- Mini Apple Pie – Vegan puff pastry works SO well with apples or other fruit. Your guests will love this every time.
- Vegan Apple Compote Danish – Oh, so delicious and delicate!
- Vegan Puff Pastry Cherry Tomato Tart – To die for! One of my personal favorites!
- Pizza! Yes, pizza! You can put sauce and pizza toppings on your puff pastry. Trust me! It’s delicious!
Frequently Asked Questions about Vegan Puff Pastry
There are a few common questions below.
-
- Does the vegan butter/shortening need to be chilled? Yes! It’s important when you’re laminating (rolling out and turning). You don’t want to start the turning process with butter/shortening at room temperature. However, it’s normal for the dough to warm up slowly during each turn.
- Is chilling the dough after every turn THAT important? It’s very important to chill the dough for 30 minutes between turns. This gives the gluten and butter a chance to rest and cool down. Your dough won’t rise when you bake; it will also become chewy.
- Does the fat content of the butter/shortening matter? It does, to a certain extent. Butter/shortening with a fat content of 82% is difficult to get in the US. The original European recipes yield flakier and more buttery puff pastry because they have access to higher-fat butter. Our vegan butter/shortening in the US has less than 82% fat content. However, if you keep the dough chilled, your puff pastry will still rise and yield flaky, buttery puff pastry. That said, Amazon sells Kerrygold European butter (82% fat) online. Remember, it is not vegan!
- Can I freeze it? Definitely, Puff Pastry holds up well after being frozen. It’s better that way!
- Why isn’t my puff pastry rising? It’s probably the butter! Your butter wasn’t cold enough or made too much contact with your hands. Or you could have rolled it and turned it too many times. We suggest no more than four turns.
- What do you recommend for store-bought puff pastry?
- Taste of Inspirations – This puff pastry is made with shortening and, as such, is vegan. I’ll use this in a pinch if I don’t have any homemade vegan puff pastry made up. It’s my favorite.
- Dufour – Dufour also makes a vegan puff pastry with shortening, which is also very good. However, I find it lacks a bit of flavor, but like Taste of Inspiration, it is pretty much foolproof.
- Pepperidge Farm – Pepperidge Farms makes its puff pastry with butter. So, this will work only for vegetarians. However it tastes great, but sometimes is can be hard to get cooked all the way through.
If you decide to make this recipe, let me know how it turned out! Enjoy!

Vegan Puff Pastry (double batch)
Equipment
- parchment paper
- Rolling Pin
Ingredients
Detrempe (makes double batch)
- 3 5/8 cups flour, sifted
- 1/2 cup neutral oil or frozen vegan butter
- 1/2 cup water, cold
- 1/2 tsp sugar
- pinch sea salt
Butter/Shortening block for lamination (double batch)
- 21.5 tbsp cold shortening or vegan butter
Instructions
Step One - Make the dough: (detrempe)
- Make the dough (detrempe): Mix all the ingredients together in a bowl and make a rough dough. Keep the dough a bit dry – don’t add too much water. This will help you get lovely layers later on. Keep mixing until you the bowl is smooth on the inside. Transfer to your workspace and knead the dough for 4 minutes using the heel of your hand. Then form into a soft ball.
Step Two - Make the butter/shortening block
- Measure your parchment paper 15cm x15cm (6″x6″). Cut the chilled butter / shortening into chunks and arrange them on parchment paper. Fold the sheet along the lines. With your rolling pin, press down and roll out your butter/shortening block. Don’t roll it past the edges! Put the butter / shortening block in the refrigerator until you’re ready to use it.
Step 3 - Add the butter/shortening block to the dough
- Remove the détrempe from the fridge. Roll it out, trying to create a rectangle twice the size of the butter. (In my case, the length of the butter is 15cm (6″), so I rolled out the détrempe to 30 cm (12″), which is twice as long plus a little extra, so there’s enough for the cover). While rolling, flip the détrempe occasionally.When you get a rectangle that has the same width as the butter/shortening but twice as long, the détrempe is ready. Remove the butter/shortening block from the fridge. Place the butter/shortening at the center of the détrempe.Wrap the détrempe around the butter/shortening and close the edges well. The dough is now ready for rolling and folding.
Step 4 - Roll, Fold, and Turn (lamination)
- First Turn (7 layers – Wallet Fold) The next day (or whenever you’re ready), remove the rough dough with the butter block and place it on your workspace. Roll it out to 50cmx20cm (20″ x 8″) to 1.5 cm (1/3″) thickness. Roll the dough up, down, up, down, and then flip it. Flour the surface lightly, but only if it’s needed. Fold one side on 2/3 of the dough and then fold the rest. This gives you a folded dough with three layers, commonly a ‘wallet fold.’ Straighten the margins. Turn 90°.Cover in plastic wrap. Keep in the fridge for half an hour or even longer during summertime.
- Second Turn (50 layers – Double Book Fold) – Time to roll, fold, and flip for the second turn. Roll the dough out to 50cmx20cm again. Fold one side on 1/4 of the dough and then fold the other side the same. Fold both sides over to form a ‘book fold.’ Turn 90° and refrigerate for 30 minutes.
- Third Turn (73 layers – Wallet Fold) – Remove the dough from the refrigerator. Roll the dough out to 50cmx20cm and do another ‘wallet fold’ this time. Turn 90° and refrigerate for 30 another 30 minutes.
- Voilà! Your dough is ready to use. As you can see in the photo above, you’ll be able to see the layers of butter/shortening easily. You can ‘turn’ your puff pastry dough as often as you want. We usually “turn’ it 3 times with a double book fold as the 2nd turn. Once your puff pastry dough is fully turned and chilled you can start making whatever pastry you want: sweet or savory.
- Then pop your puff pastry in the oven at 430° for 20 minutes and then lower the oven to 350 so it the layers will all cook through. You should easily be able to see the separate layers. Now you have a puff pastry
Notes
- You must keep your puff pastry dough chilled. This will ensure you will get those crispy, flaky layers. Chill your puff pastry dough for at least 30 minutes between rolls and turns.
- Don't use too much flour. Flour on your dough will actually prevent it from rising.
- There are three basic "turn" types for puff pastry: 1) single turn (wallet fold) 2. Double turn (book fold). 3. Combination turn: This method involves combining single and double folds. It is important not to give the pastry too many turns because too many layers will break down the layers of fat and dough, making it more like shortcrust pastry. However, too few layers will result in coarse layers of pastry that will perhaps also give uneven lift and allow the fat to run out during baking.
- There are three basic types of puff pastry: 1. French, which is the one we use 2. English 3. Scotch

0 Comments